A few weeks ago, I was photographing along the coast for a sunset shot and noticed how much haze was in the scene. So I tried a few things to remove some of the haze that in the final photo.
Add a polarizer to cut down the scattered light to reduce the haze in a landscape scene. Then, once you’ve captured your shot, you can use a combination of the Dehaze, Contrast, and Clarity adjustments in Lightroom to minimize the haze effect further and make the image clearer.
Haze is not necessarily bad for your landscape image, and there’s plenty you can do to manage the impact it has on your picture or use it to create mood in the photo and help tell the story of the landscape.
What Causes Haze in a Landscape?
Haze is an effect caused by particles in the air like smoke, water, or pollution scattering the light as it passes through the atmosphere. Haze can make a scene dull and reduce the clarity of elements in the landscape.
How to Reduce Haze in a Landscape Image?
In the second half of this article, I’ve included some tips you could use while on location to decrease the haze in the shot. I also offer some suggestions on how you could use the haze to improve the image you create. However, sometimes haze in the scene is unavoidable and makes the photo soft and lacking detail, so how can you decrease its impact when editing the picture?
A simple way to reduce haze in an image is to use the Dehaze slider in Lightroom. In addition, increasing the Clarity and Texture will bring out the detail behind the haze. Next, use the Contrast, Black and White adjustments to set the black and white levels in the haze area and make further changes with the tonal curve.
When editing out haze in a picture, there’s not just one solution that will fix it. Instead, a better approach is to use a combination of adjustments that work together to give you the desired results. So let’s have a look at your best options in Lightroom.
Remove Haze with Dehaze
The Dehaze slider is in the Basic panel (it used to be in the effects panel). Increasing the Dehaze reduces haze across the image. However, this adjustment can also have the effect of saturating colors and darkening the image. So use sparingly and in combination with lifting the exposure and decreasing the saturation.
There is also the option to use Dehaze with the Masks found above the Basic panel. Using a mask allows you to select areas of the image you want the Dehaze to take effect. Use the paintbrush tool for small spaces. Grad Filter is handy if the sunlight is coming from one side, as large regions of your image can be selected.
Add a Little Punch with Contrast
The area of your image that has haze will appear flat and lack contrast. You can add contrast back into your photo using the Contrast slider. However, be aware that Contrast adjustment affects all of the tones, from black to mid-tones to whites. If you don’t want to impact the blacks and whites, you may wish to use the Clarity slider instead. See below.
Clear Haze up with Clarity
The landscape within or behind the haze can appear unclear and lack detail in your shot. You can rectify this with the Clarity adjustment. With the Clarity slide, you can increase the contrast of the mid-tones, so the black and
Set the Blacks and Whites Independently
You may want to alter the black and white levels if you have adjusted the mid-tones with the Clarity slider. The advantage of this approach is you can change each of these independently to reach the desired result.
The haze could wash out any black tones in the image. However, the Dehaze and Contrast sliders could impact the black levels, so it’s good practice to revisit these levels after each adjustment.
Finer Adjustments with the Tonal Curve
The Tonal Curve provides access for finer adjustments to tone across the photo. You can select from one of the tonal presets and then make fine adjustments to any tonal values. While you can target adjustments to specific tones, the changes apply to the whole image.
Correct the White Balance
Depending on your location and the time of day, haze can do crazy things to your White Balance. For example, haze can filter out blue tones and unnaturally warm the scene. Alternatively, there can be blue color casts across your photo. You have the most flexibility when you capture your shots in RAW. You can always change the White Balance of a picture in a RAW format without impacting the quality of the image.
The term correcting the White Balance can be misleading. In other words, while you are adjusting the White Balance from the color or tint that you have deemed incorrect, there is no correct White Balance. Instead, the White Balance you select will depend on your creativity, personal preference, and mood of the scene.
As a general rule, I look for a White Balance, around 5600K, and easily adjusted with the White Balance slider at the top of the Basic panel.
How to Decrease Unwanted Haze in the Field? (while taking the shot)
So you’ve set up your composition, but you notice some haze, and you want to reduce it.
Will a Polarizer Reduce the Haze in an Image?
Essentially haze is scattered light from moisture and particles in the air, so a Polarizer will reduce unwanted haze before capturing the image. Decreasing the scattered light entering the lens with a polarizing filter will make objects in the scene clearer and sharper.
Change the Angle
Changing the angle that the camera is to the source of light, the sun can reduce the haze. Unfortunately, drastically changing the direction of the camera is not always possible. However, you could consider changing the direction of the light. Returning to the location at a different time of the day will have the sun at a different angle relative to the camera.
When is the worst time of the day for Haze in a landscape?
Haze is more common in the afternoon and evening as the day’s temperatures have heated the air. The warmer air expands to hold more particles, which increases the amount of haze. Winds that have picked up throughout the day also whip up dust and other particles into the atmosphere, increasing the haze effect.
In the early mornings and late evening, when the sun is low, the haze effect is intensified because the sunlight travels through more of the atmosphere.
When is the Best Time to Avoid Haze in a Landscape Photo?
The least amount of haze usually occurs in the morning, when the air temperature is lower and there’s less moisture and humidity. There is also less wind in the early morning. Therefore the air has settled, so fewer particles hang around in the atmosphere to scatter the light, reducing the haze.
When the sun is directly above, the light travels through the least amount of the atmosphere, so there is naturally less haze. However, this might cause other issues as midday sunlight is often harsh, creating dark shadows, which might not be ideal.
Is Haze a Bad Thing to Have in a Landscape Photo?
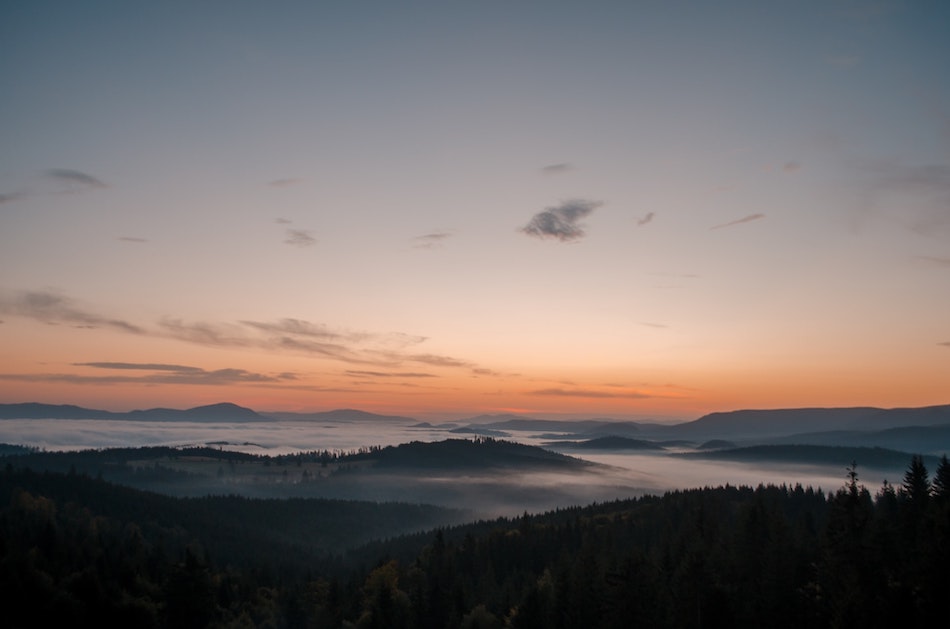
You can use haze effectively in a landscape image to improve the composition and the story you capture of the landscape. For example, haze can add separation between objects, simply a busy background, catch the color of the sunlight, and add warmth and mood to a scene.
Haze, like fog, can create separation in an image between an object in the foreground or midground and the background. Subjects that are far away from the camera will have more haze. As a result, they won’t be as clear as objects in the foreground. Haze can also simplify a busy scene reducing the potential of distraction.
The haze present on a location is an element of the landscape and, therefore, a part of the story you can capture. Think of creative ways you can incorporate the haze into the composition that tells an impactful story.
For example, light from a low-angled sun can create warm color tones in the scene that any haze will pick up. This effect can be a powerful element that you can use to create mood and emotion in the photo.
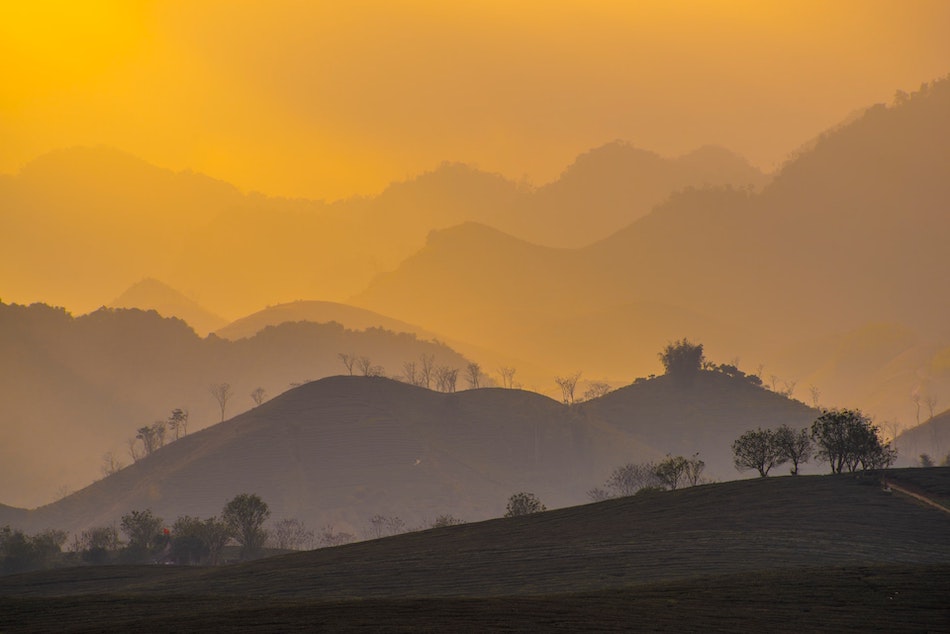
Haze can emphasize distance and introduce drama and a dynamic to your image by adding layers to distance objects and depth to your photo.
Different Haze in Different Locations
Depending on where you are photographing, the haze present at a location could be there for different reasons. The more you know why the haze is there, the better you can deal with it. So let’s look at different types and haze, mist and fog and what causes them.
Coastal Haze
Haze frequently develops along the coastline. As the onshore winds pick up throughout the day, the ocean’s waves and swell increase. The waves break and crash into the rocks and beach, throwing droplets of seawater into the air. This seaspray is pickup by the winds and up into the atmosphere and sometimes 10’s or 100 miles inland.
City Haze
The most likely cause of haze around cities and towns is pollution created by activity nearby. Factories, transport, and other pollutants are exhausted into the air.
Desert (Dry) Haze
Desert air can have haze caused by dust and sand particles picked up by strong winds and rising hot air.
Pollen Haze
At certain times of the year, there can be an increased amount of pollen in the air. Not only can this be a challenge for people who suffer from pollen, but it can also diffuse the sunlight as it travels through the air, creating haze.
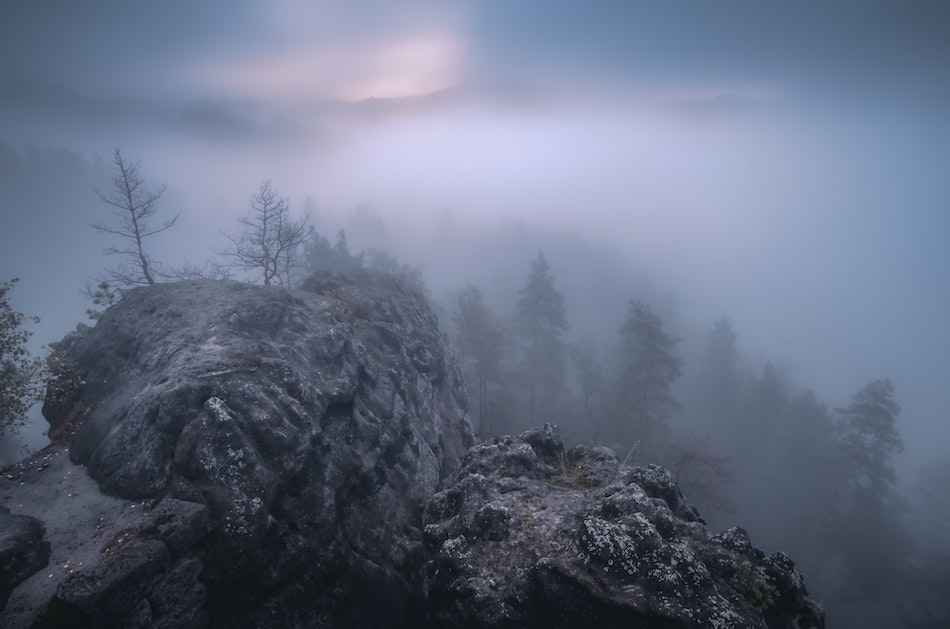
Forest Haze (Fog) – Not strictly haze, but worth mentioning
Haze found around mountains and forests is typically called fog, which is small particles of water suspended in the air. At night, moisture from plants and trees is extracted into the air and condenses due to the cooling overnight temperatures.
Mountain Haze (Mist) – Again, not strictly haze but worth mentioning
As warmer moist air moves over mountains, it pushes higher into the atmosphere and cools, creating mist. The mist then falls and settles in the valleys. If you are in the valley, the mist is effectively fog. If you can move up the mountain so you’re above the mist, it looks like you are above the clouds, often referred to as a cloud inversion.
QUICK RECAP
If you come up against haze, work out whether it’s something you want to remove. Then, consider working with the conditions and incorporating the haze into the image as part of the story.
If you decide you want to reduce the haze, use a polarizer to cut out some scattered light for a clearer image. Shoot in RAW, and then use a combination of adjustments when editing the image to decrease the haze in your landscape photo.