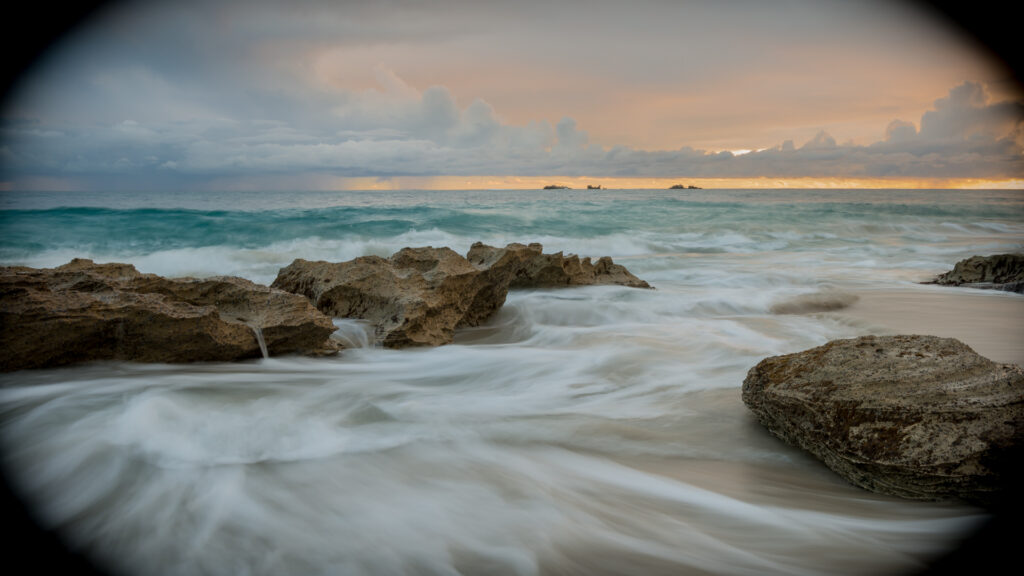
You’ve gone out on a shoot, and you can’t wait to get back to a computer and check out your shots. But then you get that sinking feeling as each image appears on the screen with black or dark shadows in each corner. What has caused the dark corners in the photo?
A common cause of black or dark corners in a photo is using a lens designed for cropped sensors on a camera with a larger sensor. Other reasons are the lens hood is incorrectly mounted or using poorly designed filters that block out more of the light around the edge of the image, called vignetting.
While these are the primary causes, vignetting can result from any object blocking the light and preventing it from reaching the corners of the senor. Let have a look at some of these causes and what you can do to fix the issue.
Using a Lens that causes dark corners on a Picture
Often the reason why the corners of a photo are dark or black is due to a full-frame camera used with a lens designed for a cropped sensor, like an APS-C. As the area of the lens that allows light to pass through doesn’t cover the entire sensor, the corners of the image will be black.
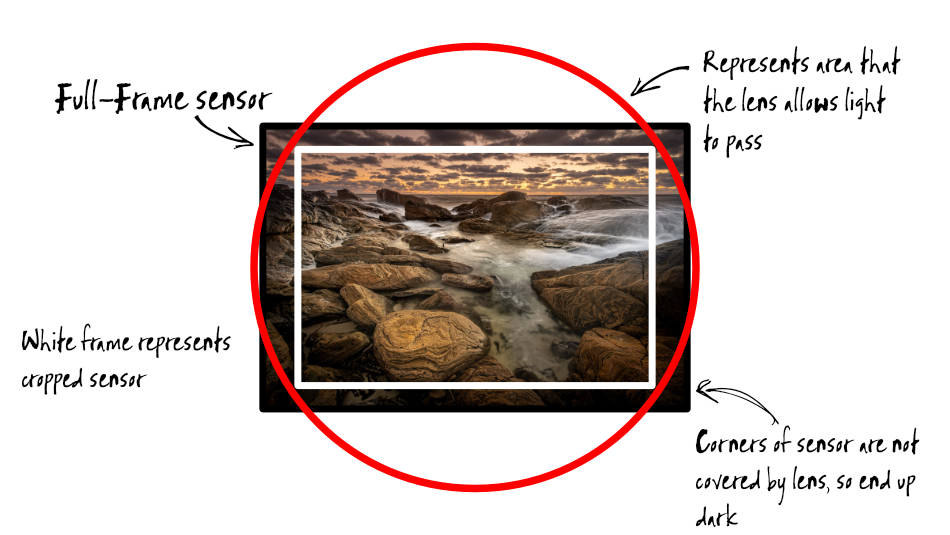
A lens designed for a cropped sensor camera will project light on a smaller portion of the larger sensor. If you’ve already taken the image, the only way to fix this issue is to crop the image removing the dark corners.
Some cameras have a cropped mode, using only the middle portion of the sensor, effectively cropping the image as you take the shot.
Lens Hood causing a Vignette in Images
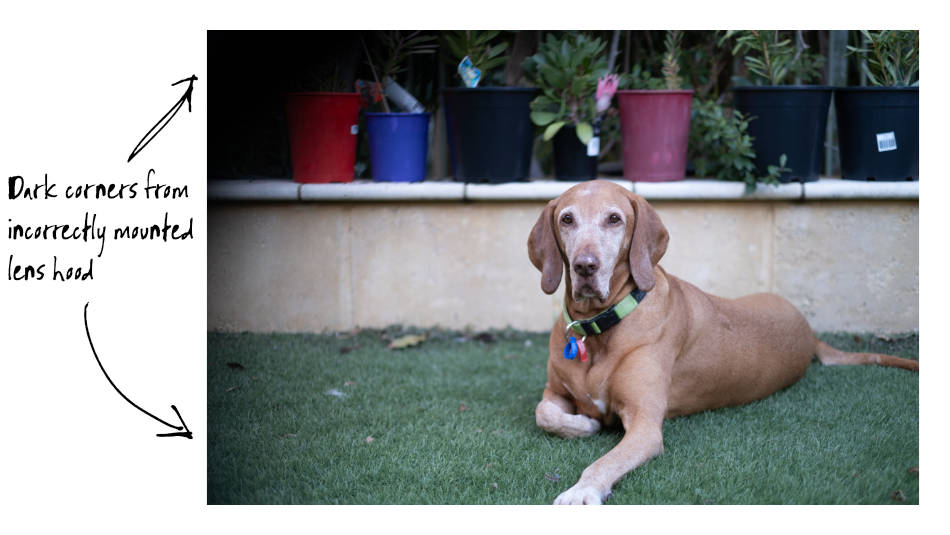
Check the lens hood matches the lens you’re using. While some lens hoods will fit onto other lenses, they may be too long and protrude into the image, causing darker corners.
Also, check the hood for the lens has been mounted correctly. If the lens hood is crooked, it could infringe on the photo. Usually, this will result in an uneven vignette on the image.
Filters that cause Vignetting on Photos
Some filters and filter systems can have a vignette effect, usually when combined with lenses with wide focal lengths.
Polarizer Filters
Polarizer filters cut down glare by removing light with wavelengths moving in a specific direction. With some polarizers, this effect can be more dramatic closer to the edge due to the angle of the light, particularly with wide-angle lenses.
Ensure you are using a polarizer designed explicitly for wide-angle landscape photography.
Neutral Density Filters
When using heavy Neutral Density (ND) Filters to take a long exposure with a Shutter Speed of more than a minute, some images can look darker in the corners of the photo. Due to the angle, the light passes through a thicker portion of the filter closer to the photo’s edge. So more of the light is blocked out.
Cheaper filters are more susceptible to causing vignetting due to lower quality materials used and the technologies employed to apply the filter effect to the glass or resin.
A few adjustments in post-processing can remove vignetting in situations where it’s relatively mild.
On rare occasions, the Filter holder itself may obstruct light from the corners of the image. Again this is more likely to happen at wider focal lengths. An example where this occurs with the LEE Filter Holder and the Nikon Z 14-35mm lens.
Other Causes of Vignetting in an Image
Other causes that may be obvious but are worth mentioning are:
Hand or Fingers – I’ve witnessed some photographers supporting the lens with their left hand over the end of the lens.
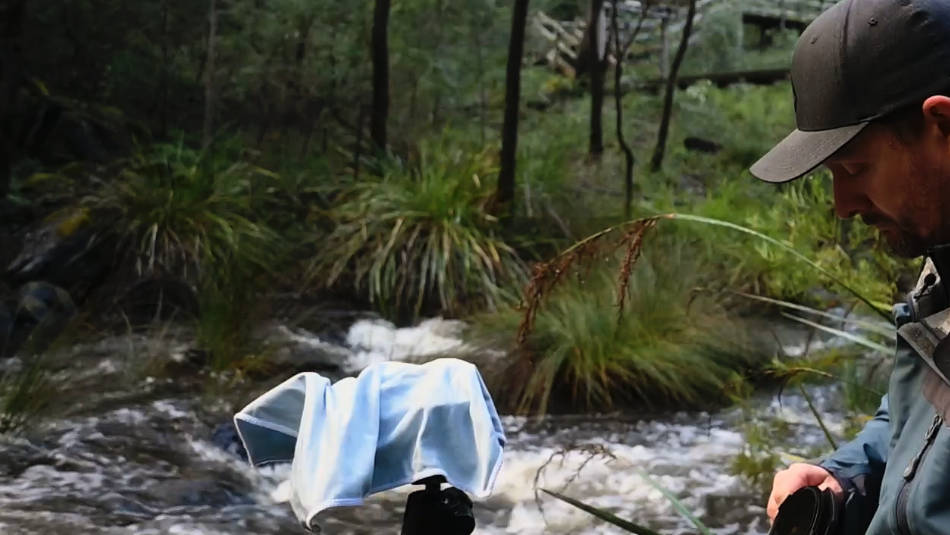
Lens Cloth – In an attempt to protect the end of the lens from being impacted by rain droplets, some photographers place a cloth over or other material to create a makeshift hood that can protrude into the image.
What is Vignetting?
Vignetting is an effect where the corners or edges of a photo are darker than the rest of the image. This effect can occur as a result of any of the situations described above. However, is vignetting in a picture always a bad this and are there other ways to create a vignette?
Is Vignetting terrible for my Images?
Not all vignettes should be considered bad for photos. Photographers use vignetting to great effect in their images. Essentially, if the vignette is distracting and decreases the impact of the image, then it’s considered an issue.
How to remove dark corners from photos?
If the image has a heavy vignette with black corners, the only option is to crop the photo to remove the corners. In these situations, where an object like a lens hood blocked the light or the lens didn’t cover the entire sensor, recovering the image is impossible.
On the other hand, if the picture has a softer, more subtle vignette, it could be possible to make some adjustments when editing the photo and remove the vignette.
There are several ways to remove or reduce the dark corners of a photo in most editing applications:
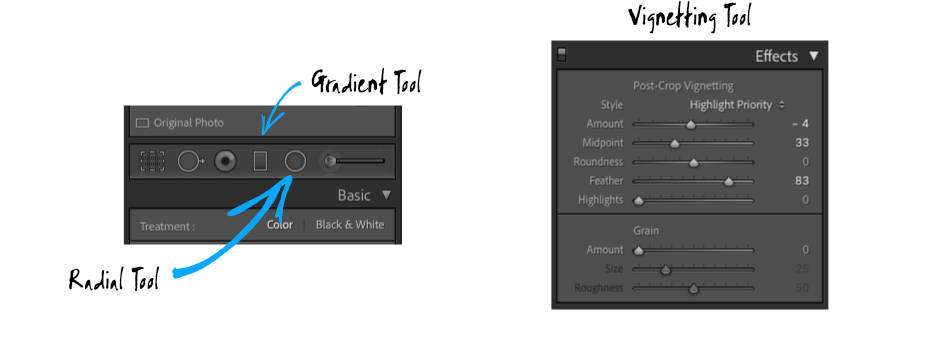
Use the Vignette Tool in the Effects panel to bring up each corner. While this is a simple technique, you have less flexibility to customize the effect or control the adjustment separately in each corner.
Use a Radial Tool to increase the exposure in all four corners. The advantage of this technique is that you can move the Radial tool around to adjust where it’s needed.
Use separate Gradient Tools in each corner to increase the exposure. The advantage of this method is you can make a different adjustment to each corner accordingly.
I prefer to attempt to remove the vignette before I start the rest of the edit. One, if I’m not able to remove the vignette satisfactorily, I won’t be wasting my time editing an already ruined image. Two, the approach used to remove the vignette could impact the rest of the post-processing.
How to add to darken the corners of a photo and create a vignette?
The easiest way to apply a simple vignette evenly across an image is to use the Vignette slider found under the Effects panel in Lightroom.
- First, apply the vignette by sliding the adjustment to the left to darken the corners.
- Adjust the Midpoint slider to move where the vignette starts, closer to the center or the edges of the image.
- Sliding the Roundness slider to the left makes the effect more of a circle (limiting the result to just the corners), or the right making the vignette a square shape.
- The Feather slider controls how gradual the effect is.
- Moving the Highlight slider to the right reduces the effect in the highlights. I tend not to use this slider as it can create high contrast in the vignette.
QUICK RECAP
Dark distracting corners in photos are usually the result of a crop sensor lens used on a camera with a bigger sensor. They can also be from:
- Lens hood,
- Filter holder, or other object obstructing the view in front of the lens
Vignette is the effect where the corners or edges of an image are darker than the rest of the photo.
Softer vignettes can be caused by:
- Polarizer
- Low-quality filters
- Natural characteristics of some lenses.
Remove heavy dark vignettes by cropping in on the image.
Remove softer vignettes by bringing up the exposure with post-processing adjustment tools.