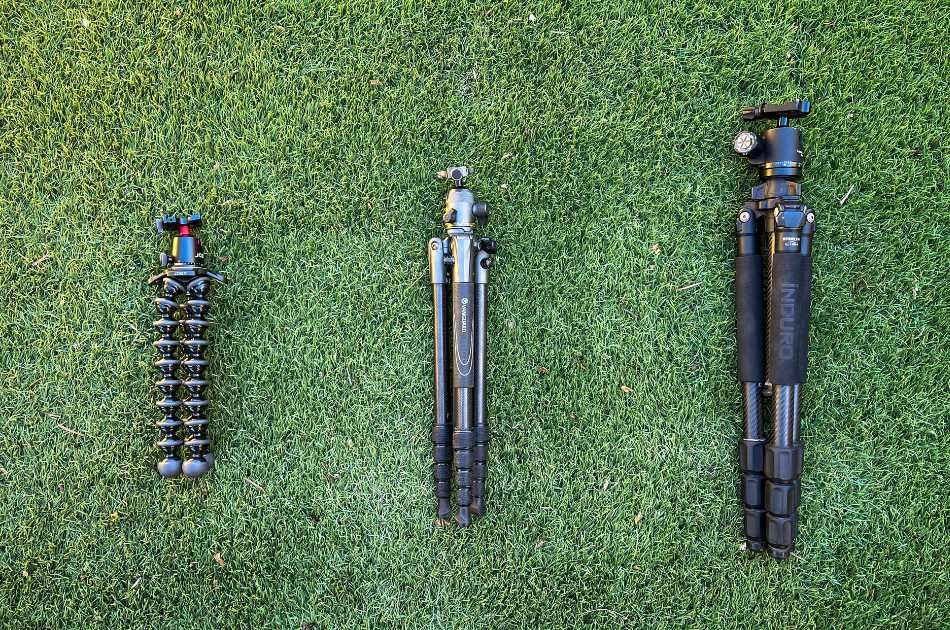
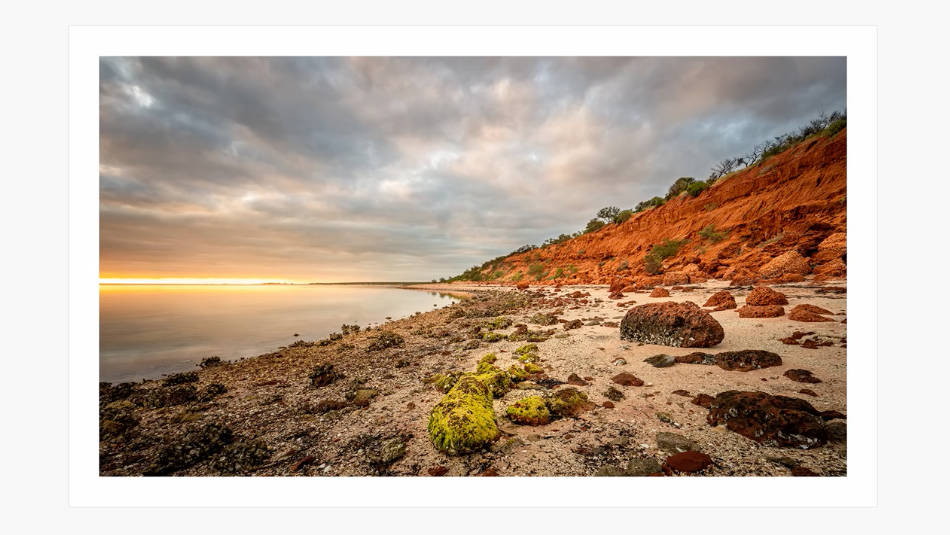
A tripod is considered an essential part of any landscape photographer’s kit. I encourage the participants in my workshops to bring a tripod with them. But, what are the benefits of using a tripod for taking landscapes?
Do you need a tripod for landscape photography?
There are many benefits to using a tripod when shooting landscape photos. Mounting your camera on a stable base allows you to capture sharper, cleaner images in low light with a low ISO with longer shutter speeds and an Aperture that gives you a large Depth of Field, so the entire scene is in focus.
You can shoot some styles of landscape pictures, handheld, without a tripod. However, there are some scenes or conditions where you’ll need a tripod. So let’s look at some situations where a tripod is going to be a benefit to your landscape photography.
So here are 11 reasons why you need to pack a tripod on your next landscape photography trip.
1. Simplify your Workflow – An excellent tool for learning
When you are starting your landscape photography journey, there are lots of things to learn. You have gear, settings, locations, composition, techniques, style, to mention a few.
With so much going on when you’re setting up a shot, using a tripod can be an excellent tool for simplifying your workflow, particularly for beginners.
Setting up your camera mounted on a tripod for a photo allows you to separate the task of composition from the rest of the action required to take the shot.
The advantage of isolating is part of the process is that you can dedicate your attention entirely to your composition before you start dialing in your settings.
This approach is beneficial when you are starting to learn about landscape photography. It’s also helpful when you are in situations where you have lots going on, like the wind or other conditions, or you might be dealing with filters.
Even though I’ve been shooting landscapes for many years, I still use a tripod when filming footage for your YouTube because I can set up my composition separately from everything else I’m doing.
It’s more challenging to deal with filters, settings, and menu options when you’re crouched down attempting to line up a shot using both hands to keep the camera still. Utilizing a tripod helps solve this hurdle.
2. To Slow Down and Consider
Setting up a tripod and mounting your camera is a relatively simple task, but it may take you a minute or two. Some could perceive this slight delay as a negative. However, there is an advantage to this change in pace, and that is it encourages you to slow down and consider the scene a little longer instead of quickly taking the shot and moving on to the next spot.
Too often, I’ve seen photographers running around with their camera in hand end up with photos they aren’t happy with because they’re not spending enough time to examine a scene and evaluate the composition options properly.
I’ve witnessed people, even with tripods, not spending time looking at the scene in front of them, but if you utilize a tripod, you are more likely to slow your pace down.
Utilizing a tripod creates a slight barrier to the temptation to rush around and forces you to take your time to observe the scene and to be more considered with your composition.
When you are moving at a slower pace, you have more time to think about the setting you are using and the options you have available to you to capture the scene with different effects.
You also are more likely to be more patient and be prepared to wait for the right conditions. Perhaps you need to right wave to crash over the rocks or the wind to die down or the light to warm up and cast those long shadows.
With your camera mounted to a tripod, you are in a more comfortable position and the right frame of mind to wait for better conditions to capture the perfect landscape photo.

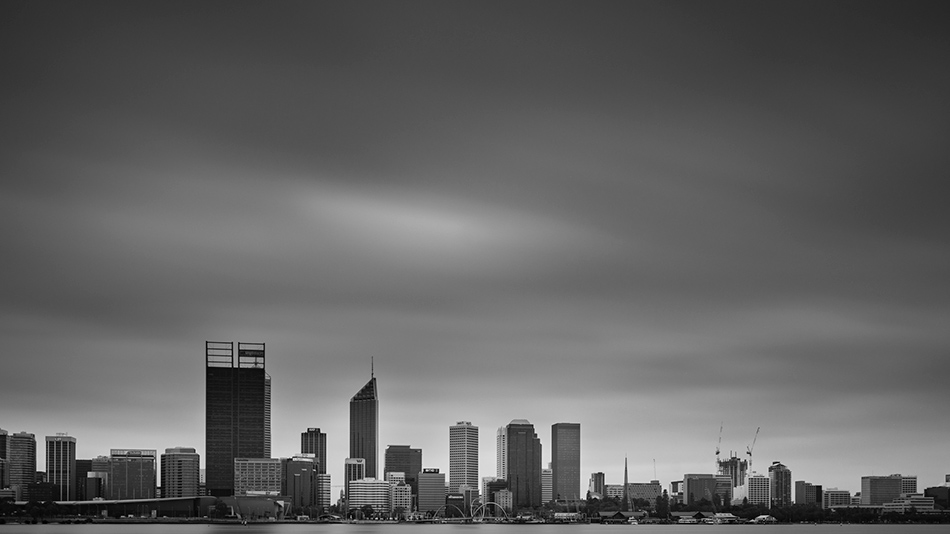
3. Photograph in Low Light with a Longer Shutter
Landscape pictures look better when they’re taken in soft, even light. So the best time to take landscape photos is at the start and the end of the day when the sun is low in the sky.
Typically, you will have less light on your scene at these times of the day than during the middle of the day.
Even woodland scenes or waterfalls in the middle of an overcast day can have a low amount of light.
With less light, you need to increase the exposure to allow the available light to hit the sensor.
If your camera doesn’t have In Build Image Stabilization (IBIS) handheld, you require a shutter speed of around 1/100th of a second or quicker to ensure you captured a sharp image. Any longer and you will have a blurred from any slight movement of the camera in your hands.
Utilizing a tripod keeps your camera still so that you can have a longer shutter time, letting you take pictures with shutter speeds of a couple of seconds or minutes long.
4. Shoot with a Low ISO
The ISO setting refers to the amount of gain applied to the light, similar to the amplitude for sound. While a higher ISO allows you to shoot in darker scenes, as the camera boosts (amplifies) the available light, it introduces noise.
For the best quality image, you should shoot your landscapes with a low ISO. Each camera has a base ISO, sometimes called native ISO.
To capture a picture with the least amount of noise, you need to dial in an ISO to match the base ISO of your camera.
Having your camera mounted on a tripod allows you to shoot in low light situations, with a low ISO for a clean image because you’re able to slow down the shutter speed, so more of the available light can be captured by the sensor.
5. Maximize your Depth of Field (Small Aperture)
It feels more natural in landscape pictures for all of the elements in the image to be in focus.
Depth of Field is the range of distance from the camera where objects are in focus. Typically in landscape scenes, you’ll have elements at various distances from the camera. So when you are dialing in your settings, you should have a large Depth of Field, so everything in the frame is focused.
The narrower the Aperture, the larger the Depth of Field is. So for many landscapes, you’ll want an Aperture around f/11. If needed, you can narrow from there up to f/18.
As I’ve mentioned above, if you are shooting in low light with a low ISO, you are limited to the amount of light available. Unfortunately, narrowing the Aperture is only going to restrict the light further. However, you can address this by increasing the time your shutter is open to allow more light, which isn’t an issue if you have your camera mounted to a tripod.
6. Take Sharp Photos
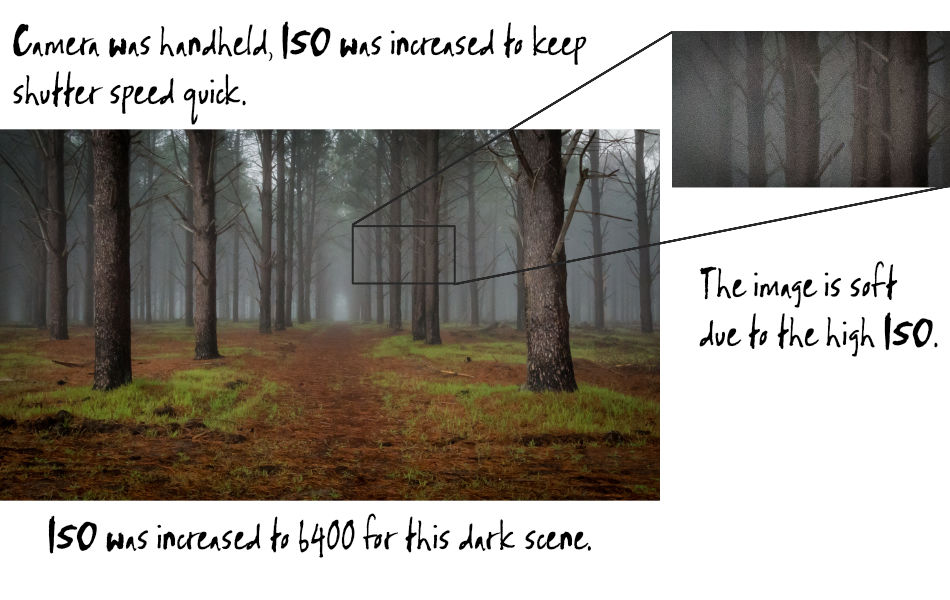
I sometimes get questions from beginners that notice the images they capture are not as sharp as they’d like. A common cause of slightly blurred images is they aren’t using a tripod.
Sometimes the issue could be due to there not being enough light. As a result, the shot requires a slower shutter speed which is too slow for the camera to take the shot handheld.
Even with a relatively fast shutter speed, say 1/100th of a second, the image could be soft if the camera slightly shifts while you take the shot. Cameras with high megapixel sensors can be prone to this because only a tiny camera movement will result in a blurred photo.
Modern cameras with In Build Image Stabilization (IBIS) can negate tiny movements and vibrations of the camera.
However, if the camera lacks an IBIS feature or the shutter speeds are longer, you’re more likely to take sharper photos when you place the camera on a tripod as it keeps the camera still throughout the time the shutter is open.
7. Taking Long Exposures
Let’s quickly recap what is Long Exposure.
Long Exposure is a style of landscape photography where you take the photo with a shutter speed from a few seconds up to several minutes. This type of shooting aims to capture moving elements like water across the beach or downfalls or clouds drifting through the sky over longer periods.
For this technique to be effective, you need the camera to be perfectly still for prolonged periods, capturing motion without any artifacts while, in contrast, stationary objects are sharp.
Cameras with IBIS can capture sharp images with a shutter speed quicker than 1/8 or 1/6 of a second if you use an effective handheld camera technique.
For a shot with a shutter speed longer than 1/6 or 1/8 of a second, you’ll need the camera mounted on a tripod to avoid any movement as the shutter is open, ensuring a sharp picture and avoiding any weird effect in the image.
8. Capturing Panoramas
When you are shooting a series of shots to create a panorama, having the camera on a tripod helps simplify the process.
You can break the task into parts. After you work out your general composition for the scene, set up your tripod, ensure the tripod head is level. A built-in spirit level will help with this.
Then mount your camera, rotate the camera left and right, checking the composition on the backscreen.
Once you have set up, the tripod does all the work keeping the camera in the same horizontal plane.
Manually set the exposure and focus so they are consistent through the entire series of shots.
Mounting the camera on the tripod keeps the camera still during each shot, maintains the same horizontal position through the series of images captured, and allows you to repeat the process multiple times.
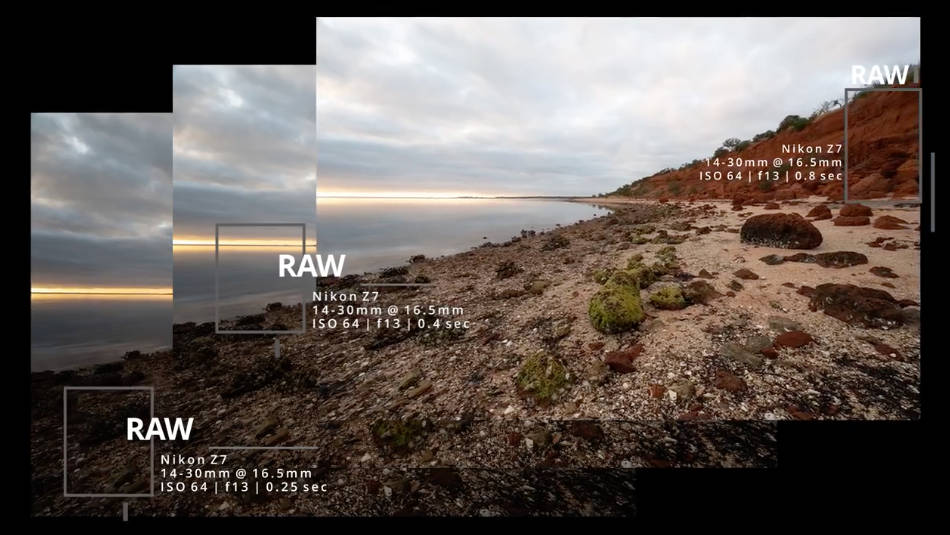
9. Exposure Bracketing
Before we get into how helpful a tripod is with this technique, here’s a reminder of when you would use Exposure Bracketing.
When the Dynamic Range of a scene is greater than the range of light your camera can handle in one shot, one option you have is to shoot a series of images at different brackets of exposures to capture the detail in the highlights and the shadows.
This process is much easier using a tripod, keeping the camera in the same position while shooting the images.
If each shot taken throughout the exposure bracketing series is not with the camera in the same position, you must align the images before merging the exposures.
Most editing software can automatically handle slight shifts of a few pixels, but larger changes are more challenging to align.
Utilizing a tripod for Exposure bracketing will keep your images aligned and allow you to shoot the bracketed images repeatedly as the light and conditions change.
10. Focus Stacking
Before we get into it, let’s start with what is Focus Stacking.
Focus Stacking is when you capture a series of images, with each shot focused on an element at a different distance away from the camera. You’d consider using Focus Stacking when the Depth of Field you have through the Aperture you’ve set is smaller than what the scene requires.
Focus Stacking is a technique similar to Exposure Bracketing, but for each image taken, the camera is focused on objects at different distances away from the camera.
The advantages of using a tripod with this approach are the same. The camera remains in the same position for each shot taken throughout the series, and you can easily repeat the process multiple times.
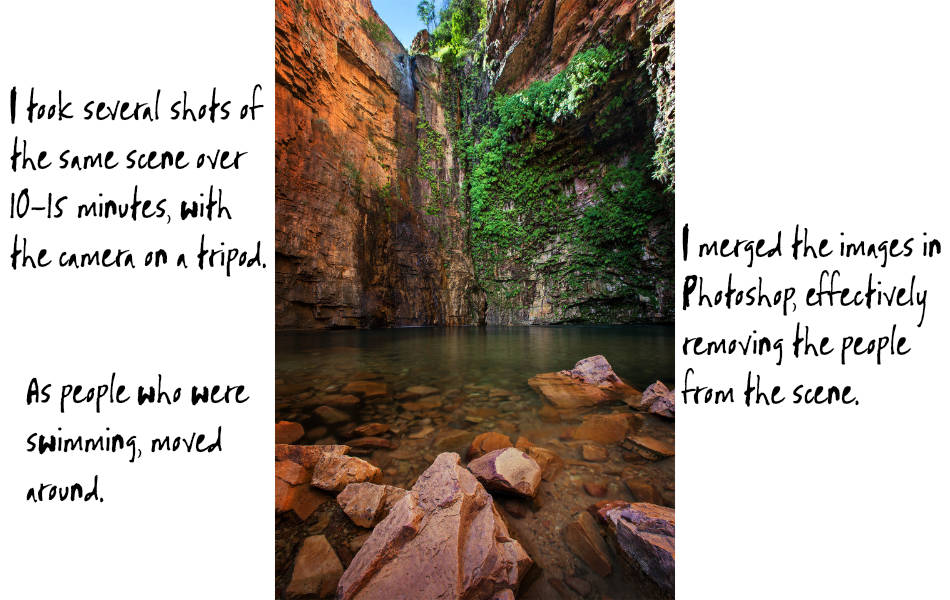
11. Removing People or other unwanted elements
A few years ago, I was shooting a location that was a popular tourist spot, and I had the challenge of people in the scene that you wanted to remove.
The scene was a natural swimming hole in a gorge in the Kimberley region of Western Australia.
I could have taken a single shot and removed the unwanted people with the remove tool, but that approach is doesn’t always work, and in my case, it wasn’t possible as some people featured quite large in the frame.
Instead, I took a series of the same shot over about 5-10 minutes. During this time, the people enjoying a swim were moving around. So they were in a different location in each shot.
When I edited the images in Photoshop, I first aligned about 5 of the photos. Then where a person was in the frame, I used the same portion of the scene from an image that didn’t have the person in that location.
Having the camera mounted on a tripod made the process much easier. I was able to stand next to the tripod, and when I noticed someone had moved, I would press the shutter button. Each image I took was the same composition without me having to frame the shot up each time.
If you are interested in more advice and tricks to taking awesome landscape photos, check out this massive guide of 21 tips for landscape photography.