Taking beautiful landscape photos is not as simple as finding a scene, point camera, and pressing the shutter button.
When I first started on my landscape journey, I enjoyed exploring locations. However, I wasn’t happy with the pictures I took, and I wanted to improve my photography.
Through practice and trial and error, I discovered what’s required to take great landscape images. So I thought I’d share what I learned.
So here are 21 tips for taking a great landscape photo.
1. Know your Camera
I don’t want to state the obvious, but you’re going to need a camera. A common question I get is, “What camera should I get?”
The best landscape photography camera for beginners is any camera that can switch between auto, aperture/shutter priority, or fully manual mode. The camera should also have interchangeable lenses so that you can capture different landscape scenes.
What doesn’t matter is the sensor size, crop ratio, the number of pixels, or if it’s a mirrorless or DSLR. Honestly, if you are only starting your photography journey, any camera will do. I still take landscapes with my iPhone. If you are interested in watching me capture seascape images with my iPhone, check out these videos on Youtube.
There’s a common saying that goes, the best camera is the one you have with you. This message refers to the fact that you are more likely to use a camera for taking photos if you carry it with you. I like to extend this and say the best camera is the one you know. You are more likely to take better pictures with a camera with which you are familiar.
The BEST camera is the one you know.
I wouldn’t suggest going out and buying a new camera as you probably already have a suitable camera that’s very capable of shooting great landscape images. What’s more important than the camera itself is you need to know your camera. The better you know how to operate your camera, the less you’ll have to think about how to set it up. So you can focus (pun intended) on capturing beautiful pictures.
Helpful settings and features you should be familiar with are:
- Selecting ISO, Aperture, and Shutter Speed
- Bracketing mode
- Exposure compensation
- How to focus
What should I buy for my first landscape photography camera?
Don’t spend much money, buy second-hand if possible, you don’t need the latest camera. If you get a camera that lets you switch from auto to priority to manual mode, it gives you more control of the settings as you gain more experience and confidence.
This feature will support your learning as you grow as a landscape photographer.
Having the option of using interchangeable lenses with the camera gives you greater flexibility when shooting different scenes, from vast seascapes with an ultra-wide lens to more intimate compositions using a telephoto zoom.
There are many cameras out there that meet these requirements, but a great camera to consider is the Nikon Z 50. I own this camera and have recommended it to family and friends who are just starting in photography. I use it for capturing both still photos and video, including vlogs for Youtube. The Z 50 is a mirrorless camera with a cropped sensor keeping it small and light.
2. Get a Wide Angle Lens
Chances are you are shooting with a camera using the kit lens that came with it. There’s nothing wrong with most kit lenses. They are designed as an all-purpose lens to cover most shooting scenarios.
Adding a lens with a different focal length can provide new possibilities when taking landscape photos.
What’s the best lens for landscape photography?
A wide-angle lens will increase the field of view so you can include more of the scene into your frame. A wide-angle lens is great for capturing large vistas like seascapes and in confined spaces like in gorges and around some waterfalls. In addition, photos captured with a wide-angle lens often have more of a dynamic feel.
The obvious advantage to using a wide-angle lens is having a field of view that can capture grand vistas often associated with great landscape photos. Another benefit of a wider lens is you can incorporate more of the foreground in your shot, providing interest and depth to your landscape picture. We talk more about foreground in Tip 18 and cover adding Depth in Tip 19.
Expansive views can more easily fit into the frame with a focal length closer to 20mm, 18mm, or even wider.
One thing to keep in mind when using wide-angle lenses is that they tend to distort objects in the scene because the optics are trying to squeeze the entire scene into the image. However, distortion is more evident with subjects with corners and straight lines not typically found in nature, so it isn’t too much of an issue when shooting natural landscapes.
Be aware that a wide-angle lens can make objects in the distance look small. For example, mountains in the background can appear smaller, less significant, and therefore less impactful in your image.
3. Mount Camera on a Tripod for a better quality
You can get some great photos by just walking around handholding your camera. Handholding makes it easy to take a quick snap. However, using a tripod provides more flexibility with your settings. As a result, you can be creative and capture a better image.
How will a tripod Improve my landscape photography?
A camera mounted on a tripod doesn’t move while you take a photo, allow you to shoot in low light with a long shutter speed and a low ISO. These are ideal settings for landscape photography and will enable you to take higher-quality images with less noise.
For the highest quality image, you want to set the ISO as low as possible. The lower ISO has less noise but requires more light.
There’s more information about ISO settings in Tip 7.
So to compensate for the lower ISO, you’ll need to select a longer shutter speed. If your shutter speed is much longer than 1/100 second, there more of a chance you’ll accidentally move the camera as you are taking the shot if you don’t have it mounted to a camera. Any movement of the camera, regardless of how small, will result in a blurry image.
PRO TIP – A camera mounted to a tripod can still move or shake a faction when you press the shutter button to take a shot. To avoid this happening, use a remote shutter cable to fire off the shutter without shaking the camera.
Some modern cameras have In Body Image Stabilization (IBIS), which handles micro-movements of the camera. If your camera has IBIS, you might find you can successfully capture sharp photos at 1/50 or 1/10 of a second while holding the camera in your hands. But I wouldn’t suggest you rely on IBIS, especially when you want to shoot with the shutter open for much longer times.
There’s another indirect benefit to using a tripod. Setting up a shot with a camera mounted to a tripod takes a little longer. As a result, you are less likely to move around to different positions, which is tempting to do when you’re in a new stunning location. This situation might sound like a negative. However, being forced to slow down by using a tripod helps you take your time and to put more thought into the photos you take.
I discuss slowing down and give yourself time in more detail in Tip 14.
There’s a lot of cheap tripods available, but this is where I’d suggest you perhaps spend a little money if you can and get a tripod that suitable for the job you want it to do.
What are the features of a good tripod for landscape photography?
Look at getting a light tripod that’s rated to hold the weight of your camera and lens comfortably. Carbon Fibre is robust and lightweight but more expensive than the aluminum equivalent. Getting a tripod where the legs move independently from each other, it’s easier to use.
I suggest getting twist-lock legs over lever-lock legs as I find them quicker to set up and more weatherproof and dirtproof, but it’s a personal preference.
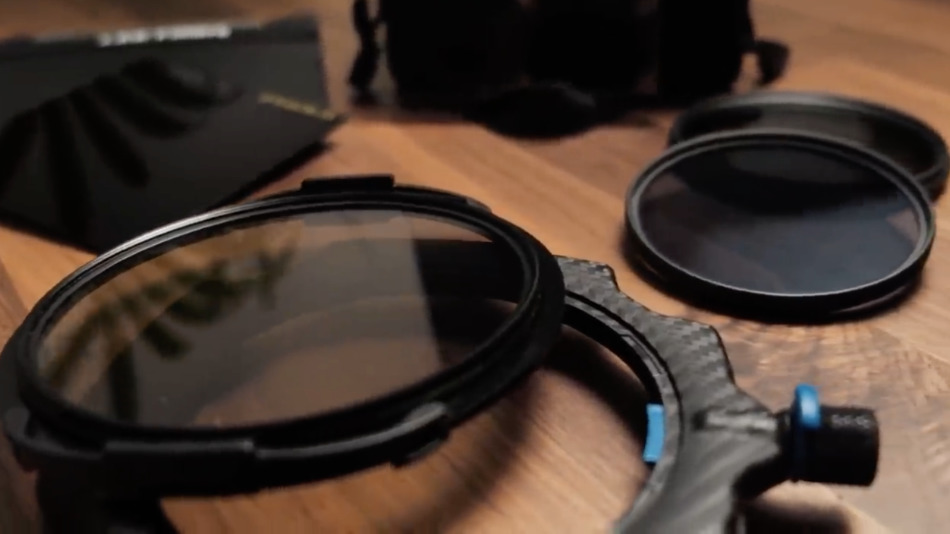
4. Use a Polarizer to Cut out Glare
A Polarizer is the first filter I suggest anyone getting into landscape photography purchase. I use a Polarizer for 99% of my landscape photography. The only time I don’t use a Polarizer is for astrophotography and when shooting in fog.
As light reflects off objects in a scene, it tends to scatter. This scattering of the light creates glare, which can be distracting in an image. A polarizer mounted to the lens reduces glare in a picture by blocking some wavelengths of light before it passes through the lens.
How does a Polarizer improve your landscape photos?
A Polarizer cuts down the glare on wet surfaces like rocks and leaves and removes reflected light from the water’s surface for a cleaner image. A Polarizer also cuts through haze and makes green and blue tones more saturated and punchy.
Types of Polarizers
There are two different types of Polarizers available.
Screw Mount Polarizers are cheaper, light, and easy to use as they screw directly onto the front of your lens. However, if you have lenses with different thread sizes, you’ll need to buy multiple screw polarizers, one for each lens thread size.
A Polarizer for a Filter Mount System can be more expensive as you need to purchase the Mount System and the Polarizer. So I wouldn’t recommend this option until you’re sure you want to invest in your landscape photography. However, once set up with a Filter Mount System, you’re able to reuse your filters and polarizers on lenses with different thread sizes using Mount Adaptors.
Landscape photographers use a range of Filters beyond Polarizers to control light and create effects in the images they capture. Check out this video for a complete walk-through of the filters I use for landscape photography.
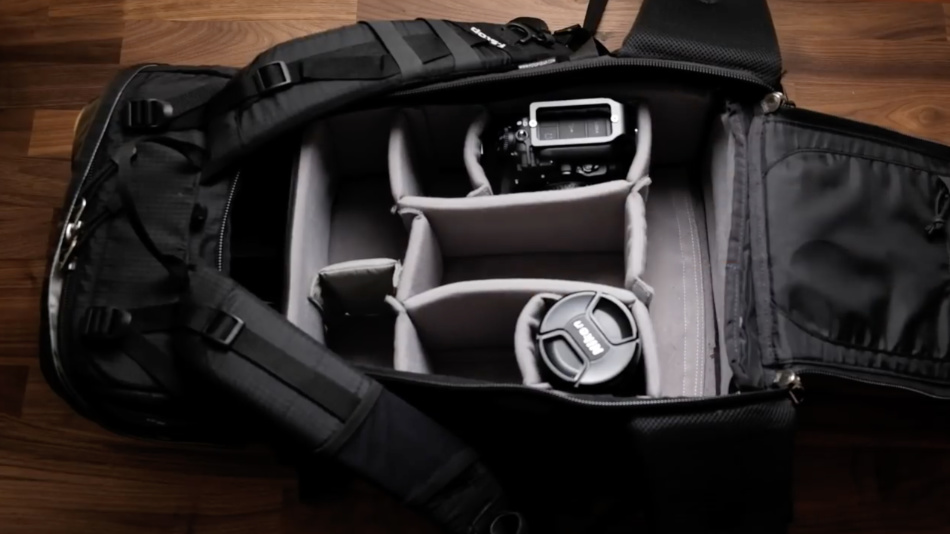
5. Bring a Functional Bag
You may not think that a camera bag is a crucial piece of equipment to consider. However, the bag you decide to take can impact the success of your next landscape trip.
Let me explain.
What are the essential features of a landscape photography bag?
The essential features for a landscape photography bag are;
- Capacity to fit your camera gear and other personal items,
- Protection for your equipment from damage and the weather,
- Access to gear quickly and easily, and
- Comfort while on your back for long periods.
I’ve already mentioned a couple of pieces of gear you need to take, and there are a few more through the rest of this article. So it would help if you had a functional camera bag that allowed you to carry your camera, lenses, filters, and accessories along with other items you require for your trip.
Not only does the bag hold your gear, but it needs to do so in such a way so the gear itself is protected. For example, lenses banging into each other and rubbing against camera bodies will leave you with damaged equipment. Therefore, you require a bag with compartments or pockets lined with foam providing excellent protection for your gear. Also, consider getting a bag that offers some level of moisture resistance, so if you do find yourself in some bad weather, you are the only one that ends up wet.
The ease of getting your camera equipment out of your bag when setting up for a shot is another aspect to consider. Some bags open from the top, others provide side access, and some bags have an opening either on the front or back.
Side access is handy when quickly grabbing items on the run, but this is less necessary while shooting landscapes.
I like to view the entire contents of my bag at once. So I’ve tended to go for bags where I open the whole of the front or back up. With these sorts of bags, I don’t have to pull everything out in search of a particular item.
Work out how comfortable the bag is going to be to carry around when fully loaded with gear. Again, I regard this a fundamental factor as comfort when out in the field contributes to our outdoor experience, an aspect we cover in more detail later on.
Backpack-style bags are generally at the top of the list for comfort on trips much more than a few hours or where you are required to walk into a location. However, camera backpacks with hiking harnesses and shoulder straps are more suitable for extended walks.
I use an F-stop Tilopa bag with thick padded shoulder straps, an adjustable back harness, and a waist belt to distribute weight evenly. While not cheap, I’ve had the bag for ten years. It has come with me to Iceland, UK, and across Australia and still looks new. F-stop has an extensive range of camera bags you can check here.
6. Select Auto or Manual Mode
Auto Mode is a good option if you want to take a picture and don’t want to think about the settings. Perfect for when you are just starting. When you press the shutter button, the camera measures the light available in the scene, determines the appropriate ISO, Aperture, and Shutter Speed settings, and takes the image.
The camera bases the settings on the exposure metering alone and doesn’t know anything else about the scene or the style you are trying to achieve. So, for example, the metering doesn’t consider if something is moving in the frame that you wanted to freeze with a quick shutter speed or if you wanted to capture a long exposure photo.
If you are not quite ready to manually select settings and want to leave the camera in Auto Mode, see if there is a Landscape Picture Mode you can choose. This mode still auto-selects the exposure settings for you, but it chooses ISO, Aperture, and Shutter Speed values more suited for landscape pictures.
Should you use Auto or Manual Mode to shoot landscape photography?
To take better landscape photos that have more impact and impress your friends, you need to gain creative control of the camera by switching it out of Auto Mode into Priority or Manual Mode, where you select the settings.
Can you take Landscape Photos in Priority Mode?
Selecting Priority Mode lets you choose the Aperture or Shutter Speed values and have the camera calculate the other exposure settings. This way, you decide on one of the exposure values based on the scene and the desired effect. The camera will then calculate the other values.
Switch to Aperture Priority Mode when you want to select the Aperture value and then have the camera automatically select the Shutter Speed based on the exposure metering. This approach is handy when shooting landscape pictures that require a large depth of field.
When there are moving elements in the scene, switch to Shutter Priority Mode so you can control the Shutter Speed before taking the shot.
Full Manual Mode gives you complete control over the exposure settings, providing you more creative flexibility.
You can capture many landscape scenes using one of the Priority Modes. However, there are some situations where I prefer to shoot in full Manual Mode, for example, at the beach where there are crashing waves. In this scenario, the scene is dynamic, and the light is changing.
So instead of relying on the camera to determine the exposure, I like to dial in the exact settings.
Depending on how comfortable you are with changing the settings on your camera, select Shooting Mode that is right for you and the scene you are capturing.
7. Keep the ISO Low
To capture an image with the highest quality and least amount of noise, you want the ISO at the base ISO of the camera. Most modern cameras have a base ISO of 100, sometimes referred to as the Native ISO.
Regardless of which Shooting Mode you choose, you should manually set the ISO to the base ISO of the camera, so you capture a clean, noise-free image.
While ISO technically refers to the Gain or how much the sensor amplifies the light, you can think of ISO as the sensor’s sensitivity to light. The higher ISO, the more sensitive the sensor is to light.
The challenge when taking a landscape picture with a low ISO is you need plenty of light.
Often the best time to take landscape pictures is in low light with a small Aperture. So to compensate for the low ISO, you (or the camera) need to select a slow Shutter Speeds to allow enough light to hit the sensor.
If the camera’s shutter is open for much longer than 1/100 of a second, the camera will likely move a faction while taking the shot, resulting in a blurred image. Mounting your camera on a tripod will address this and allow you to shoot photos with long shutter times up to several minutes.
8. Choose an Aperture between f/8 to f/16
The Aperture is how wide the opening in the lens opens when you take a shot. Think of it like your pupil. The wider it is, the more light it lets in and vise-versa. The Aperture also determines the Depth of Field.
Depth of Field (DoF) is the distance between the closest object to the camera that’s in focus to the furthest thing from the camera that’s in focus. A narrow Aperture f/8 to f/22 will provide a larger DoF. The wider the Aperture f/8 down to f/1 gives to a smaller DoF.
Generally, it’s more pleasing to someone looking at your landscape if everything in the picture is in focus. Landscapes have elements in the scene that are different distances away from the camera. To ensure all objects are in focus, regardless of how far from the camera they are, you need a large Depth of Field (DoF).
One other factor to consider is diffraction, a physical property of light when it passes through a small opening. As a result, Apertures narrower than f/16 start to introduce diffraction resulting in a slight blurring in the image.
What’s the Best Aperture to use for Landscape Photography?
For most landscapes, you’ll want an aperture between f/8 and f/16. Much wider, and you won’t have the Depth of Field you need to have everything in focus, much narrower, and you’ll introduce diffraction causing blurring in your photo.
9. Pick the Right Shutter Speed for the effect
If your camera is in Auto Mode, it will assume you are holding the camera in your hands to take the shot. As a result, the camera will select a quick Shutter Speed to reduce the chances the image will come out blurry due to you accidentally moving the camera as you take the shot.
The camera would then compensate for the lack of light from the fast shutter by increasing the ISO and widening the Aperture, resulting in a grainy image or an insufficient Depth of Field. These settings are not ideal for landscape photography.
One of the most significant benefits of mounting your camera on a tripod and switch to Priority or Manual Mode is you’re able to have the shutter open for longer with no risk of a blurry image and therefore maintain a low ISO and suitably narrow Aperture. This approach is even more beneficial when shooting in low-light conditions.
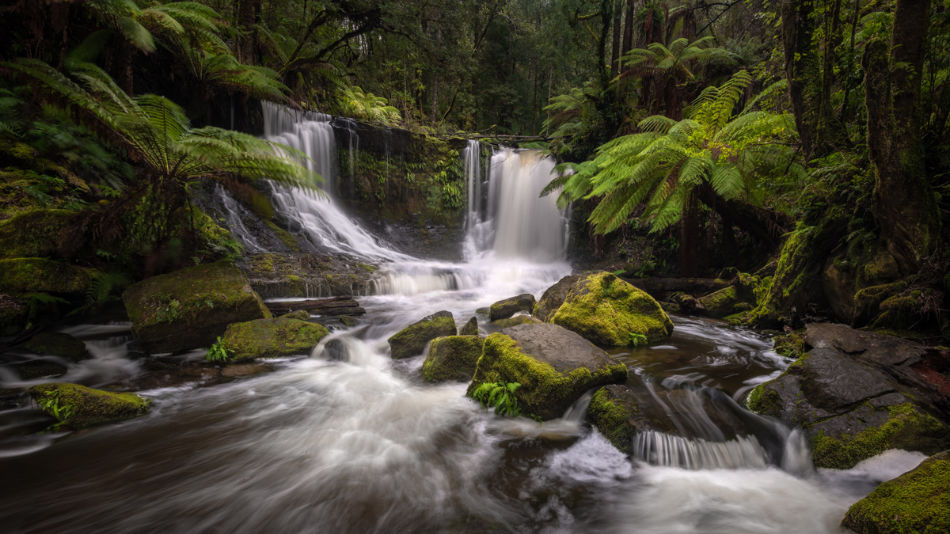
When deciding what Shutter Speed to select, consider what’s moving in the scene and how you’d like to capture that movement. For example, if trees or grass are being blown around by the winds, you may want to freeze any movement with a quick shutter speed. However, if you are shooting a waterfall or beach scene, you may choose to capture the motion of the water, creating a silky effect with a Shutter Speed between 1/3 to 2/3 of a second.
Experiment with varying Shutter Speeds. Capturing different moving elements in the scene is part of the creative process. You’ll quickly learn what effects you likely and what fits with the style of landscapes you enjoy capturing.
For more information for capturing stunning photos, check this article where I walk through the best settings for landscape photography.
10. Shoot in Soft Light
Getting outdoors when the sun is bright and high in the sky is ideal for hiking and exploring locations. However, these can make photographing the landscape challenging.
Light from a bright sun overhead causes dark shadows and harsh reflections off surfaces directly in the sun. The difference between the darkest areas and the lightest parts of a scene is called the dynamic tonal range or just the dynamic range. The human eye can see a broader range of tones at once, but unfortunately, even modern cameras struggle to capture the dynamic range of a typical sunny scene in the middle of the day.
A stunning and engaging landscape photo captures detail from the darker regions through to the brightest areas. It helps entice the viewer to explore an image further. When the light is soft, either from the clouds defusing the sunlight or at the beginning and end of the day when the sun is lower in the sky, it’s easier the take a good landscape picture.
When the light is soft, the dynamic range is not as vast, and your camera can more easily capture detail from all parts of the scene.
Golden Hour
The golden hour is the first hour after the sun rises and the hour just before the sunsets. It’s referred to as golden because of the general color of the light. The soft, warm tones are more pleasing to look at in an image, and together with the sun’s low angle illuminating the landscape, there are minimal harsh dark shadows.
Blue Hour
Blue Hour refers to the hour before the sun has risen and the hour after the sun has set. The blue nature of the light can be striking against the warm tone of the landscape and the remaining red and orange light reflecting off the clouds. In addition, the light is generally even softer than during golden hour, causing fewer dark shadows and allowing for images with longer shutter times.
I highly recommend that you plan to make the most of a location and shoot through the Golden and Blue Hour and witness how the landscape changes as the intensity and color as the light shifts.
11. Plan your Location
The likelihood of a successful trip often comes down to the planning. Of course, you don’t have to plan every last detail, but there is some information about your location that could result in you taking better photos if known.
Access to Location
How you will get to the spot and generally where you want to shoot is good to know upfront. For example, how close can you park the car? How far will you need to hike? Is the location in a National Park that closes at a specific time?
The more you know about how you access a place, the more likely you will arrive in time and the better prepared you’ll be when on location.
The Terrain
Be aware of the terrain you can expect on the way into the location and on-site. This way, you can be prepared for what’s required to access and move around.
Can your car handle the tracks into the location? Do you have suitable footwear? How level is the ground? How much weight will you be carrying?
Movement of Sun
If you know roughly where the sun will be throughout the day, it takes much of the guesswork out of predicting the sort of light to expect.
The most critical times to know are when sunrise or sunset is going to occur. It is also handy to have a good idea of approximately which direction the sun will rise or set.
Knowing the movement of the sun and the direction of the light can help work out how the light will fall across the scene and inform your composition.
Travel Time
In Tip 10, we discussed the advantages of shooting in soft light, particularly around sunset and sunrise and the hours before and after. Once you’ve researched when the sun will in the optimum position for the light you want, You need to make sure you give yourself plenty of time to get to the location.
Arriving late puts unnecessary pressure on you, impacting how relaxed you’ll be and your ability to think creatively. We cover this topic in more detail later in Tip 14; Give yourself time.
Work out your travel plan and give yourself plenty of time to reach the location so you can deal with any unexpected delays. If you are there early, it gives you time to explore.
Conditions
It’s wise to be aware of the forecast to ensure you can pack for cold, wet, or changing weather. This information is also helpful to know so you can plan for the best shooting opportunities on your trip.
The day may start sunny, but perhaps clouds are predicted to roll out, providing you with nice diffused light in the middle of the day.
Understanding the conditions and how they’ll change while on location gives you a better chance of making the most of your photography opportunities as they come around.
Your awareness of the conditions should go beyond just the weather.
Check out online tourist guides and local park websites to find road and track closures, flood warnings, and other local alerts that could impact your trip or provide epic conditions for that stunning landscape photos.
Mobile Reception
Not that this will improve the photos you take directly, but I like to know if I’ll have mobile reception while on location.
The main reason is safety and the expectation that I could contact family or help if I found myself in some trouble.
It is also handy to know if I could access information on weather conditions or tracks while in the field. For example, if I’m aware there’s no reception, I can prepare with offline maps, weather information, and GPS communication and navigation.
Resources:
It’s easier to plan a trip if you’ve already visited the location. One of the advantages of previously scouting a photography spot is you already know about the access, terrain, and travel time. However, you’re visiting a new location, see what information you can gather from Internet sources.
Google Maps will provide accurate travel time to popular areas and some spots off the beaten track.
Google Earth offers terrain information, including altitude and 3D flyovers of spectacular locations, so you can gain a good understanding of the landscape before you arrive.
Maps.Me is an app for Android and iOS that gives you offline maps that show access tracks and trails you can follow. Fantastic for locations that don’t have mobile service.
12. Check the Weather
Understand the weather and its impact on the landscape photos you take will significantly improve your landscape photography.
Beyond temperature and predicted rainfall, I concentrate on knowing the following weather elements:
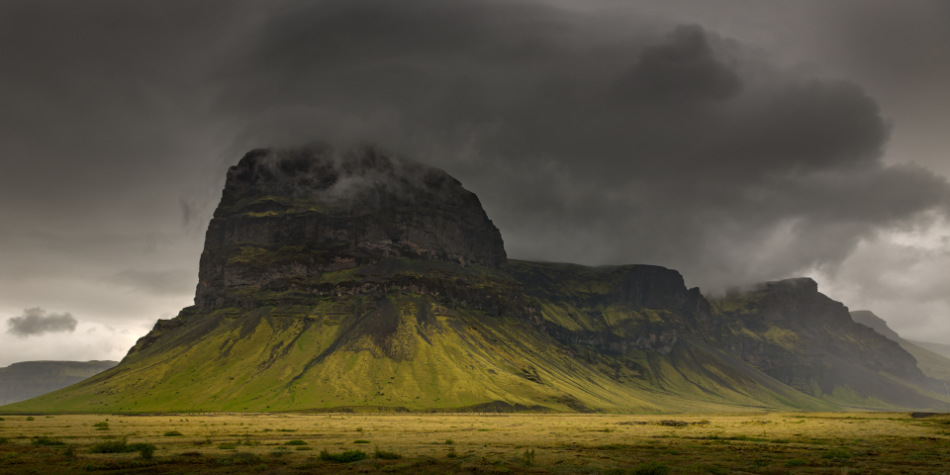
- Cloud – I’m interested in how much cloud and how high the cloud will be. High cloud provides excellent conditions for colorful sunsets and sunrise. General cloud cover is ideal for shooting waterfall and forest scenes in the middle of the day.
- Wind – The strength and direction of the wind in helpful to know when capturing seascape. The wind strength impacts how chopping the ocean will be, and the wind direction is a good indication of whether there’ll be much seaspray to manage.
- Fog – Fog provides mood and drama to a landscape photo and is fantastic in masking out a busy background to simplify a potentially messy scene.
- Swell – The swell height is a good indicator of the general size of breaking waves at the beach. However, if the swell is too large, the seawater will inundate you and your gear.
- Tides – Tides times and tide heights are critical to be aware of around beaches, creeks, and natural floodways. For safety, you don’t want an incoming tide to trap you on the wrong side. Generally, outgoing tides are safer, provide you more time to compose a shot, and leave enticing patterns as the water drains out to the sea. This effect can make great foregrounds in landscape and seascape pictures.
- Storm Fronts – While rain does not seem ideal for photography, if you stay around until after the storm clouds pass, there is a high chance of beautiful light on the landscape shining through the broken clouds. I’ve captured some of the most spectacular landscape photos straight after a storm front passed.
13. Get Inspired
You can find inspiration to get out and take breathtaking landscape pictures from several places. The process of planning a trip, packing my gear, and tracking the weather conditions often gets me fired up and excited about a photography trip.
I also find inspiration when looking back at photos I’ve taken from a location I’m about the revisit. However, if I’m visiting a place I haven’t seen before, I’ll search for images from other photographers who have photographed the area.
I don’t intend to copy the photographs, but I can gather lots of information from researching images from others.
You can begin to identify some of the elements in the area like flora and features of interest, for example, rivers, waterfalls, and mountains. You can observe how the light falls across the landscape, and you can start to appreciate what it’s like being on location.
The images you’re researching are likely to be taking at a different time of the year, so conditions won’t be the same when you arrive in the area. All of this is fine as the purpose is not to replicate the pictures but to find inspiration to explore the region, find your composition, and capture what you see in the landscape.
14. Give Yourself Time
There are three parts to this advice that can all contribute towards improving the landscape pictures you capture.
Time to Explore
The first part is planning to get out to the location early to give yourself plenty of time to explore the area. Besides the fact that the trip out to the place you want to photograph might take longer than expected, you want to give yourself time to look around and work out what parts of the landscape you’d like to capture.
If you are new to the location, there will be a greater need for you to spend time familiarizing yourself with the area.
Even if you’ve visited the area before, use the time to seek out the local conditions and look for changes to the landscape, investigate different sections to discover new scenes to shoot.
Time to Compose
The second part is to slow down and allow yourself time at a particular spot to make adjustments to your compositions.
When I first started taking landscapes, I fell into the trap of running around a location shooting several different compositions only to find I was disappointed with my photos. The issue wasn’t the location. I just haven’t taken the time to examine the scene and work the best composition.
We will delve into composition later in the article, but the point I want to make here is once you’ve found a scene to shoot, you need to take the time to reassess your composition and make changes to improve how you’ve composed the elements.
I’m unlikely to nail any composition in just a few seconds. So it’s a better approach to spend the time making improvements to take a more impressive picture. Even if it means I walk away with fewer images, but I’m happier with the photos I do take.
Time to Shoot
The third part is to take the time to shoot well before and to continue shooting past when the ideal light occurs, particularly for sunsets and sunrise, so you are shooting throughout the Golden and Blue Hours.
You made an effort to get out there, so you may as well maximize your time and opportunity to take photos. The more time you spend shooting, the better your images are going to be.
The other advantage to shooting well after the best of the light is that you can witness the light changing and watch its effect on the scene. The light and how it interacts with natural elements is a key component to a great image. When you capture how the light falls across a landscape, the photos you take will improve and be more compelling to the viewer.
15. Observe your Environment
Developing your observation skills as a photographer will help you identify better compositions of the landscape to capture.
If you enjoy landscape photography, I will assume you enjoy being out and exploring the natural world. So you are probably a keen observer of nature.
However, observing your environment in this context is the skill of identifying elements in the landscape and natural interactions that would make for an engaging photo.
Landscape photography is not simply taking a photo of any part of any landscape.
So take some time to scout out the area. Explore the landscape and find subjects, like a tree, mountain, or a river, that could be the main interest in your picture. When you’re observing your environment, looks for elements like textures or colors that would further create interest in the photo.
The trick is to find a part of the landscape that together creates an interesting scene. I think of it as a mood board, where I pick out elements in the landscape that gives the viewer an idea of what was attractive and what caught my interest in the area.
The longer you spend observing the environment, the better you’ll get at identifying features of the landscape that you’d like to include in your photo.
Continue exploring the area, keeping these elements of the landscape in mind. You’ll eventually come across a spot that incorporates some of these elements in a way that’s not too busy and has some order or structure. A scene like this is a great place to start looking at how you could compose the elements for your photo.
We’ll cover how the elements go together in a landscape picture later when we discuss composition.
16. Make sure you’re Comfortable
It may not seem that your comfort in the field impacts how good your landscape pictures will be, but let me explain.
There are two aspects to this.
The first part is, the more comfortable you are, the longer you’re likely to stay in the field. We’ve talked about the advantages of staying in an area to shoot beyond the ideal light in Tip 14. So the more time you can spend in a location, the great the opportunities for capturing more inspiring photos of the landscape.
The second part is if you are comfortable and relaxed, it’s easier to focus on your photography, think creatively, and as a result, take better landscape images. Whether you’re exploring an area, tweaking a composition, or working out the best camera settings, the more uncomfortable you are, the trickier these tasks will seem.
Being aware of the conditions, part of Tip 11, should be part of planning for your location. If you know what the temperatures and winds will be like and the expectation of any rain, you can prepare for those conditions.
Bring appropriate footwear for the terrain you’re going to cover and clothing that suits the range of predicted temperatures. Keep in mind that temperatures often dip suddenly after the sunsets, a period of ideal shooting time.
I bring a few layers of clothing to adjust what I’m wearing throughout the day and evening. I find this approach also good when I need to hike into a location where I’ll warm up only to cool down quickly once I’ve stopped for a few minutes.
I also ensure I have plenty of water with me for hydration and some light snacks (nuts and dry fruit) to keep my energy up and my creative juices flowing.
17. Use the Rule of Thirds
To make sure you take the best image of a scene, you want to spend some time thinking about the composition and arranging the objects in the photo.
In a landscape, you can’t physically move the objects in a scene around. Instead, you have to move your camera around so the elements reposition in relation to each other within the picture.
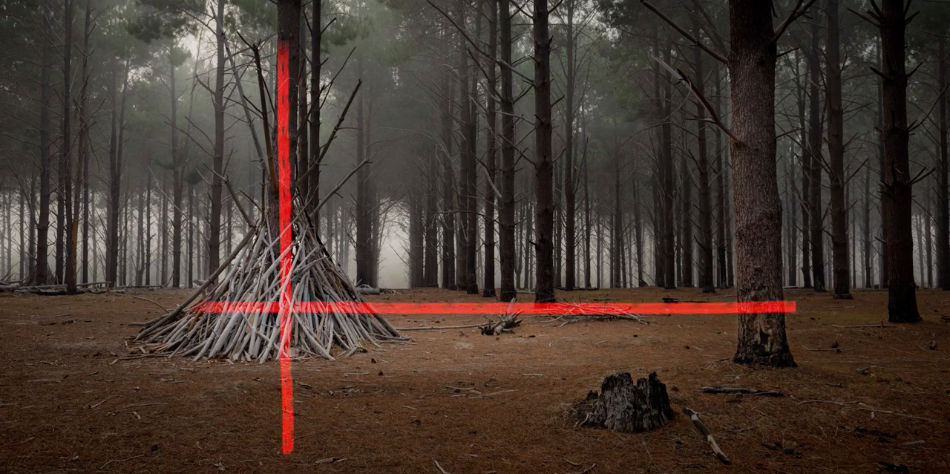
Create an imaginary grid splitting the frame into thirds both horizontally and vertically. You end up with nine cells like a noughts and crosses game. Positioning features in the scene, so they roughly line up with these lines or where they intersect, can improve the composition you create.
For example, if you are shooting a tree in a field, instead of placing the tree in the center of the frame, change the camera angle, so the tree lines up with the right or left vertical line. This composition instantly improves your landscape picture as it’s more pleasing to the viewer.
This approach also works for the horizontal lines that you can use to line up the horizon or other features in the scene.
Not all scenes will benefit from simply placing objects on the thirds, but this is an excellent approach to try if you are struggling to find a composition that works.
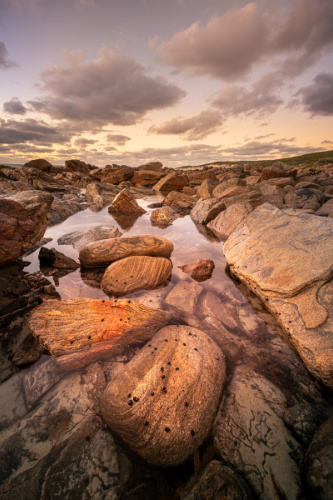
18. Find an Interesting Foreground
When you find a central subject of interest, one of the most effective ways to create a scene that makes a great landscape photo is to look for interesting elements you can include in the foreground of your picture.
How does Foreground Interest make a Better Landscape Photo?
An interesting foreground adds impact to your landscape picture. Details in the lower third of your image provide context to the main subject. Including foreground in the shot helps the viewer better understanding what the scene was like and added depth, enhancing your landscape photo.
Improving your landscape composition with some foreground gives the viewer some insight into the surrounding area. In addition, your photo can feel more compelling to the viewer as they gain a sense of what it was like standing in front of the scene themselves.
Incorporating a foreground is an effective way of guiding the viewer’s eye from one part of the image to another. This movement of the eye makes your photos more engaging.
The closer you get the camera to the foreground, the more dynamic your landscape image will feel.
Positioning the camera low to the ground can make it easier to incorporate the foreground in the frame. In addition, use a wide-angle lens, as suggested in Tip 2, to include more foreground elements in your landscape shot.
For a comprehensive explanation of how interest in the foreground can help improve your photos, read this article I recently wrote on Taking Better Landscape Photos with Foreground Interest.
19. Create Depth
Your landscape photos will be more engaging if you can create some depth within your images.
How do you Create Depth in a Landscape Photo?
You can create depth within a landscape image using layers, positioning elements in the foreground, midground, and background of the scene. For example, adding an object close to the camera, balanced with an object in the distance, can add depth and a dynamic feel to your landscape picture.
When you incorporate some interest in the foreground, as suggested in Tip 18, you add depth to your photos. You can extend this idea and position elements in the frame so they are different distances away from the camera. This composition effectively guides the viewer’s eye through the scene, making it more engaging to see.
Framing the main subject with other elements closer to the camera is another way to add depth to your shot.
To ensure you have all objects in focus at various distances from the camera, set a large Depth of Field (DoF). As discussed in Tip 8, a narrow Aperture of f/8 to f/16 will give you a DoF suitable for most landscape scenes.
20. Include Leading Lines
We’ve already touched on the power of leading the viewer’s eye through a landscape photo. It helps the viewer make sense of what they are looking at, enhancing the viewing experience of your landscape image so it’s more enjoyable.
Patterns and lines within a photo intuitively draw in the viewer’s eye. So finding compositions that emphasize lines that naturally occur in the landscape will improve the images you take.
The viewer’s eye will instinctively follow lines found in a picture. Therefore, you want to ensure the guiding lines you create with your composition lead viewers towards the main subject of interest in the photo.
Lines in an image can work against you, guiding the eye away from the main interest towards the edge of the frame. Issues like this can be distracting in a landscape picture.
21. Get Creative and Discover A Different Perspective
I want to bring this discussion back to the fact that landscape photography is a creative art. While the gear, planning, and rules, help us take better landscape pictures. Our creativity allows us to take photos of the landscape that are different and that stands out.
So when you’re exploring an area for a compelling composition, try using a different perspective. Experiment with unusual and unique arrangements of the elements within a scene.
You might usually set the camera up at eye level so try lowering the camera to waist height or ground level.
Some locations offer up compositions that are easy to find. But that doesn’t mean you can’t get creative once you have captured the obvious landscape photo of an area. So head off the beaten track, and explore unique compositions that others don’t necessarily spend the time to find.
Your creativity is only limited by your imagination, the time to experiment, and your willingness to make mistakes. Of course, not every image you take under these circumstances will be great, but through experimentation, you’ll build a style for your photography and create unique photos of landscapes that will impress your friends.
As a final note, I want to mention the best strategy you can employ to improve your landscape photography is practice. Similar to most skills, once you understand the basics, developing those skills requires repetition. This ties in with several of the other tips I’ve outlined here, none more so than your willingness to spend the time honing your photography skills and discovering which approaches work for different landscapes.
If you are looking for some inspiration, I encourage you to head over to my YouTube channel, where I share some of my landscape photography adventures and walk you through how I capture my landscape photos.