There’s lots of movement in seascape scenes, making the photography exciting.
A Solid Neutral Density filter is one of my favorite filters to pull out at the beach.
A Neutral Density filter reduces the amount of light evenly from across the scene, allowing you to slow the Shutter Speed without the need to adjust any of the other exposure controls. ND filters help you create stunning effects in your seascape photos as moving elements are captured over a longer shutter speed.
There’s more to it than slapping any ND filter onto the front of your lens and hitting the shutter button.
The usual rules of composition and correct exposure should be taken into account.
Plus identifying the reason and what you are trying to achieve by using the ND filter will ensure you get the best results.
What is a Neutral Density Filter?
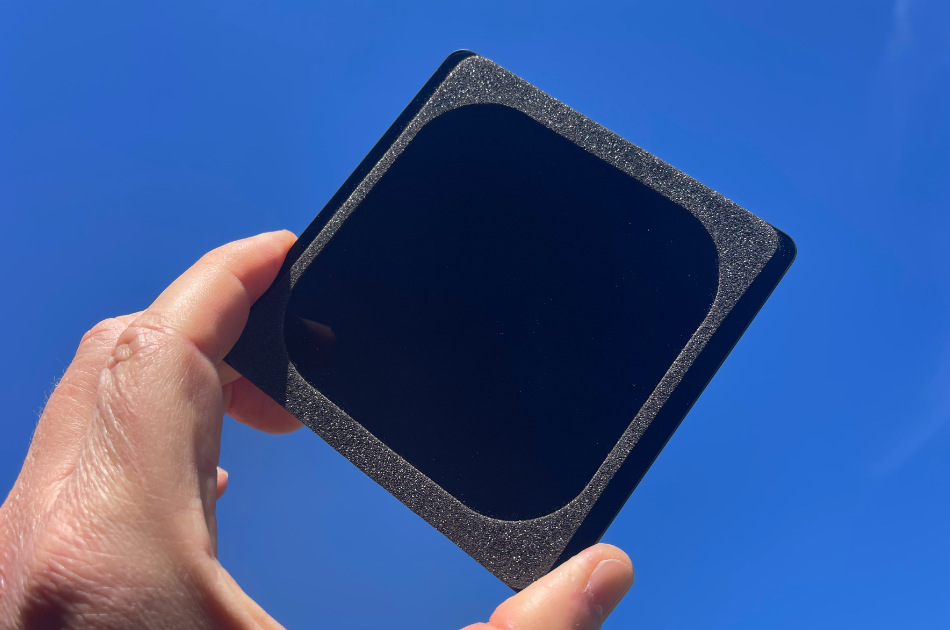
A Neutral Density (ND) Filter is a glass or resin filter with a dark tint applied to it, so when placed in front of a lens, it removes some of the light from the scene.
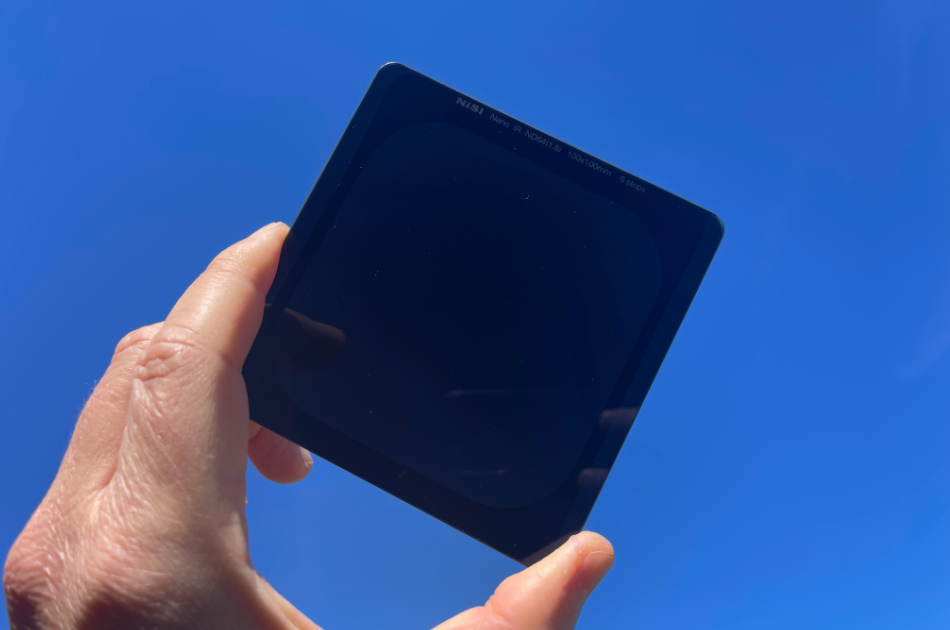
An ND filter is consistently dark across the entire filter, unlike an ND Graduation filter, where the density transitions from dark to clear.

NiSi ND Long Exposure Kit
Included in this kit is a 3-stop, 6-stop and 10-stop filters so you can set up long exposures in most light conditions. Perfect for any landscape scene, including seascapes.
Using ND Filters to Capture Engaging Seascapes
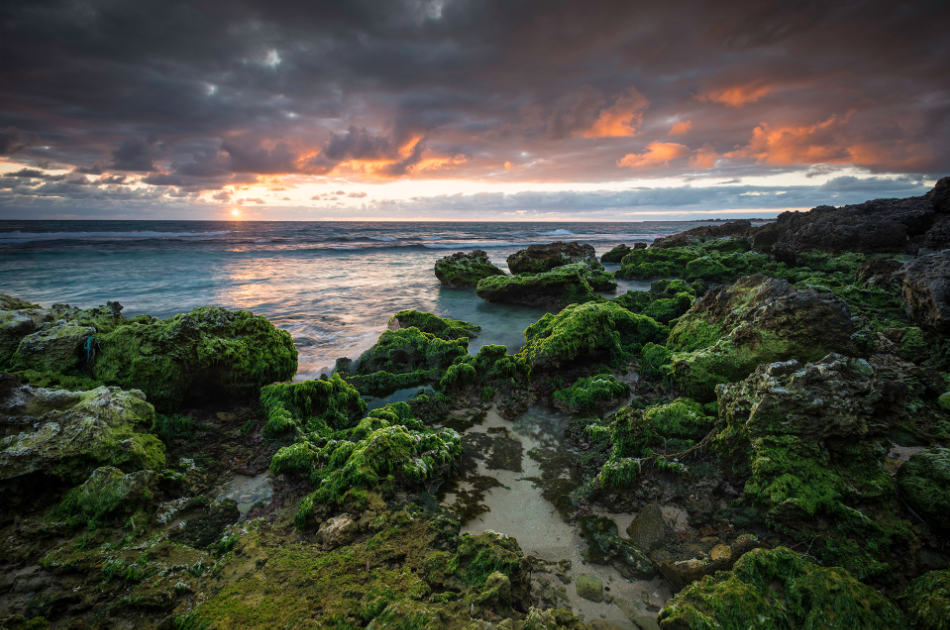
There’s usually lots going on in a seascape scene.
You may have sand or rocks in the foreground. Then, there’s the moving ocean water, the crashing waves creating foam pushed up the sand, through gaps in the rocks, towards the camera.
Other elements may be moving in the scene, like seaweed in the foreground, breaking waves in the mid-ground or clouds slowly floating past in the sky.
Now this scene sounds like the perfect photography location. It’s one of the reasons why I like taking seascapes so much,
But the image may not look great if this scene is captured with a shutter speed of 1/125 sec. Why?
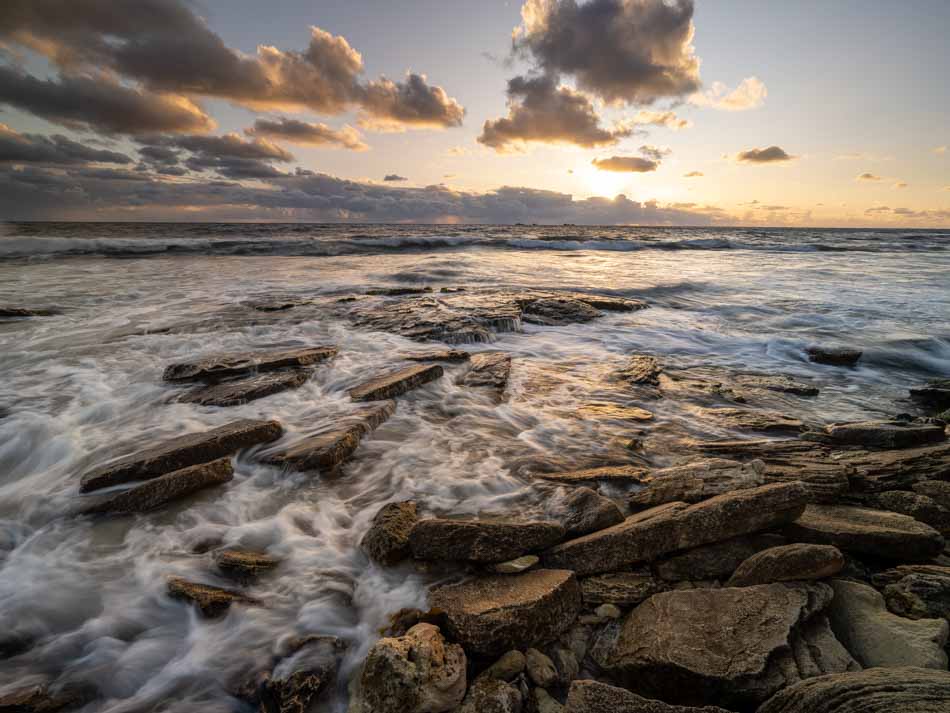
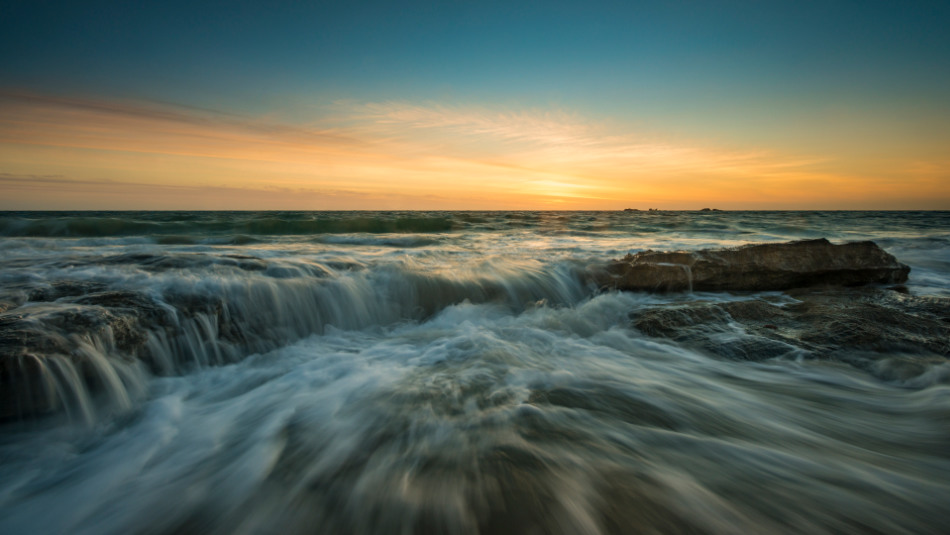
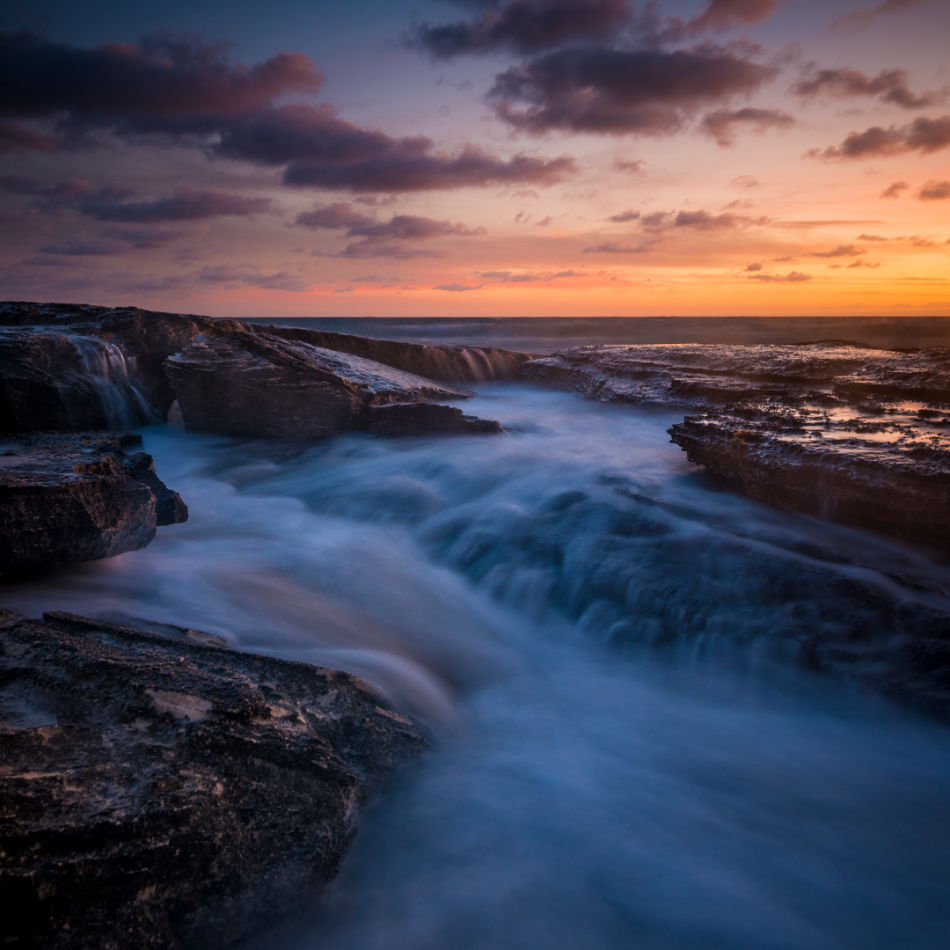
Compare these two images in the gallery above. The first image is taken with a shutter speed of 1/3 of a second and the next image had a shutter speed of 1/125 of a second.
Seascape photos with lots of movement can seem messy when taken with a fast shutter speed.
Even though freezing the movement in the scene can seem similar to what the eye sees, it’s more of a documentary photo of what the scene was with any mood and feeling removed.
Images taken this way can seem odd to the viewer as no connection is made with the scene.
The scene looks better when captured with a longer shutter time (slower shutter speed).
Capturing elements in motion can create an impactful effect in your seascape photo.
Objects moving towards or away from the camera can produce lines and textures acting as lead lines that guide the eye.
Why do you need an ND Filter?
A slower shutter can be gained by lowering the ISO and narrowing the Aperture.
However, there’s a limit to how long you can get the shutter time just by adjusting the settings on the camera.
An aperture much above f1/16 and you’ll start introducing noticeable diffraction that can soften the detail in an image.
If you push the ISO below the base ISO of the camera, the RAW image can lose some contrast and saturation. This may seem like a minor issue as you can add contrast and saturation to the photo when post-processing, but some detail can be lost and never recovered.
If you use the camera settings, there will be a limit to how long you can get the shutter time. If there’s a reasonable amount of light, you may only be able to extend the shutter to 1/6 or 1/5 of a second.
To attain a significantly slower shutter speed down and not overexpose the shot, you need to remove several stops of light from across the scene.
That’s when you need an ND filter.
3 Ways ND Filters Can Enhance Your Seascape Photos
Seascapes are a unique genre of landscape photography with their unique challenges and rewards.
Used correctly, ND Filters can play a vital role in creating distinctive seascape images that are engaging.
1. Clean Up a Messy Scene or Simplify a Complex Scene
While beach scenes are exciting locations to shoot photos with crashing waves and moving water, this constant movement can seem messy and complex.
When these seascape elements are captured with a quick shutter speed of 1/125 sec, there may be too much going on in the scene, which can seem distracting and potentially confusing to the viewer.
With an ND filter, you can slow down the Shutter speed to a point where moving objects are captured in a way that draws less attention.
For example,
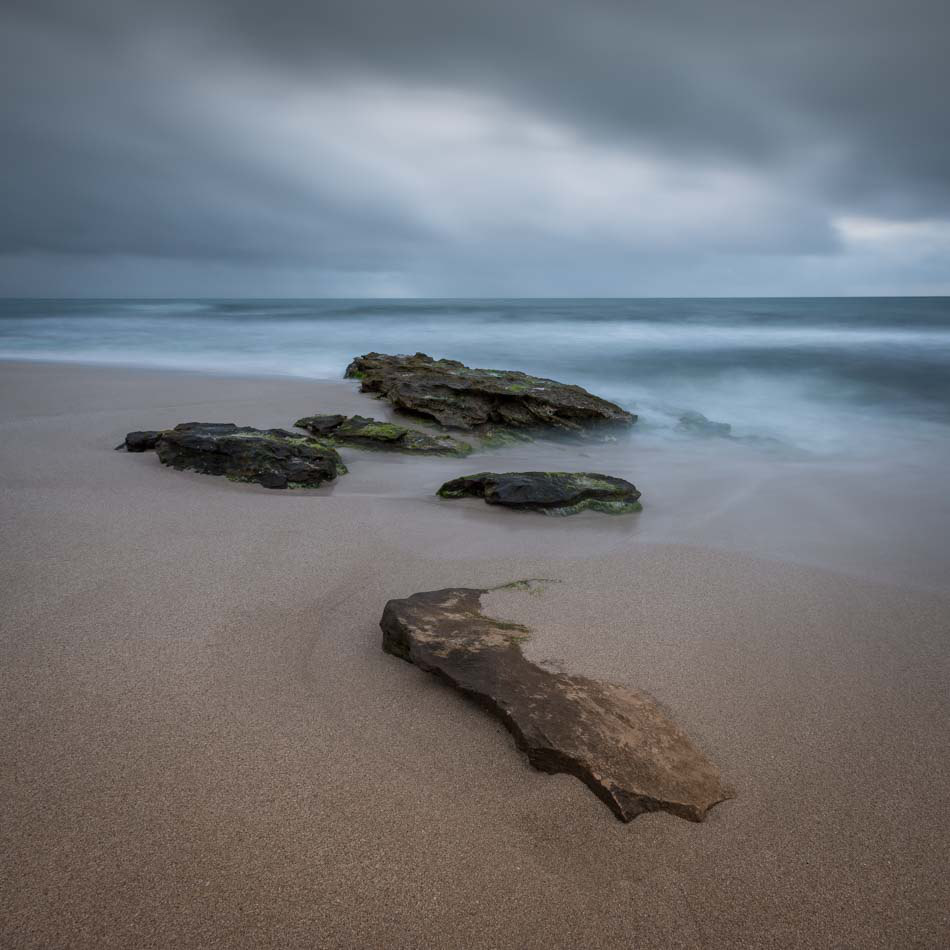
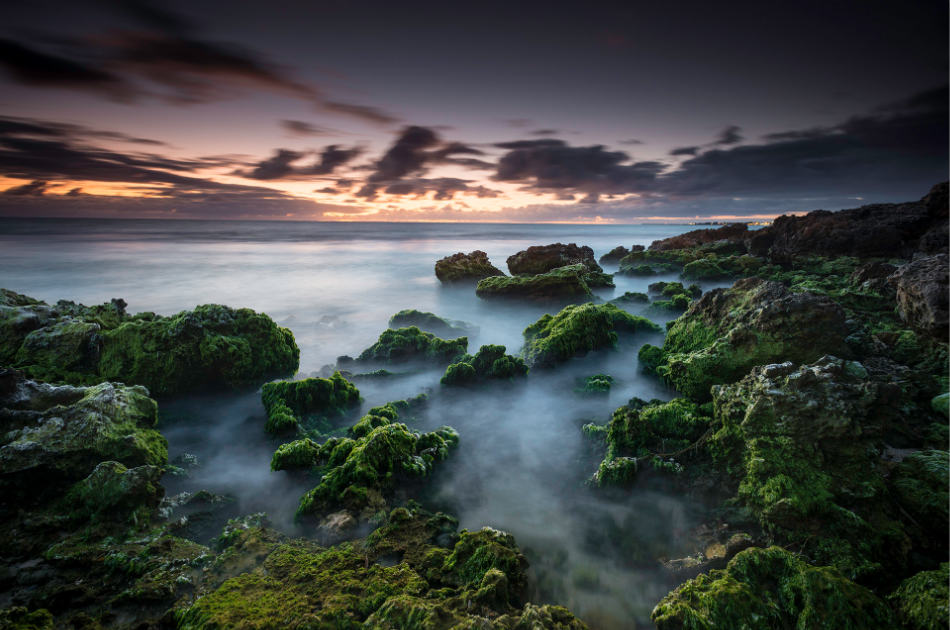
I’ve used ND filters to capture moving water with an extended shutter of a few seconds so the moving water in the foreground is not noticeable.
By removing the distraction of the water, I simplified what would be a complex scene drawing the viewer’s attention to the rocks and subtle textures in the sand.
2. Create a Different Effect that is Unseeable with the Human Eye
We are used to seeing the world in motion.
That’s why we enjoy it when part of that world is captured in a still moment through a photo. It provides an opportunity to engage with everything captured within the frame at that moment.
Moving elements can be incredibly engaging when captured in a still image.
Moving elements can be incredibly engaging when captured in a still image.
It can be a moment just a fraction of a second long, like a wave smashing into a large rock taken at 1/125 sec. Nevertheless, the energy captured in the picture is powerful and can be admired.
However, sometimes that moment must be longer to add interest and mood and tell a different story.

For example, the way a smaller wave pushes over a rock at the water’s edge and cascades down the other side can’t be captured within 1/125 sec but requires a shutter speed closer to 1/3 to 1 second.
Capturing movement in a seascape over an extended shutter time allows you to create an effect that our eyes aren’t used to seeing; in fact, it’s unseeable with the human eye.
Many of the effects generated by a longer shutter create interest in a photo that’s unusual to the eye and therefore help you produce compelling seascape images that are fascinating to look at.
For this reason, ND filters allow photographers to be creative and capture something curious that can make your images captivating to view and explore.
3. Enhance the Composition and Engage the Viewer
One of the most critical components of a beautiful image is its composition.
Composition impacts the way the viewer sees and engages with your seascape picture.
Using a Neutral Density filter and lengthening the shutter to a few seconds, you can capture the patterns and paths moving elements make in that time.
Foam pushed up the sand or between rocks captured at 1/3 or 2/3 of a second can create eye-catching white lines that contrast beautifully with the darker rock and sand along the foreshore.
If the water moves toward the camera as you take the picture, the foam can create enticing leading lines in your image that draw the viewer into the rest of the scene.
Taking a shot with a much slower shutter exaggerates any movement in the scene. Allowing you the create contrast between moving (the waves) and stationary (the rocks) elements in a seascape.
How to Use ND Filters to Capture Seascapes?
Like any photo of a seascape or landscape, ensuring you have the composition, exposure, and focus right before taking the shot is essential.
So let’s look at how a Neutral Density filter can impact these critical components.
Composing a scene taken with an ND filter
Composing a scene like a seascape should be thought of as telling a story.
Through the composition, you introduce the elements, highlight interest within the scene and guide the viewer through the image.
You are showcasing interesting aspects and interactions within the landscape.
Through the composition, you introduce the elements, highlight interest within the scene and guide the viewer through the image.
Slowing down the shutter speed using an ND filter can create patterns and lines from moving elements in the scene.
So when considering your composition, be attentive to the movement in the scene and the effect it will create in an image capture with an extended shutter time.
When I’m at the beach observing the water pushing the foam through the rocks, I look at the direction the water is moving.
I position the camera so the water is moving towards the camera, perhaps in the direction of one of the bottom corners of the frame.
In doing this, I’m leveraging the effect of the moving element, creating engaging interest plus leading lines that draw the viewer’s eye into the rest of the scene.
I decide on the composition before I place the ND filter on the lens.
Exposing an image taken with an ND Filter
When adding an ND filter to your lens, you simply remove some light from the scene.
Think of it like someone has turned down the brightness of the sun.
Dialing in the exposure settings with an ND filter is no different from how I usually would.
I’m using the ND filter to reduce the brightness so the light is softer and easier to work with.
The usual exposure settings and approach apply.
Capturing a typical seascape in manual mode, I do the following.
For a clean image with a minimum of noise, I use the Base ISO for the camera; on my Fujifilm GFX100s, I use ISO 100; on the Nikon Z7, I use ISO 64.
To ensure I have the entire scene in focus, I create a large Depth of Field using an Aperture of f 1/11 to 1/16.
Monitoring the histogram in Live View on the rear LCD screen, I adjust the Shutter Speed, ensuring the histogram graph doesn’t touch the left or right side.
You have two options to determine the final exposure when using an ND filter.
Method 1. Calculate the Shutter Speed
Work out your Exposure settings as you would if you were taking the shot without an ND filter, then use an app like the LEE Filters – Stopper Exposure to calculate what the new shutter speed needs to be changed to so you can achieve the correct exposure when the ND filter is applied.
Method 2. Camera Meters the Scene
Mount your ND filter and use the camera’s metering to determine the scene’s exposure.
You can use Aperture Priority mode, and the camera will automatically adjust the shutter speed.
I prefer to have the camera in manual mode and continue monitoring the Histogram as I adjust the shutter speed.
So you can set the correct shutter speed to achieve the desired effect while ensuring correct exposure, adjusting the aperture and ISO may be necessary.
Tip
Most cameras have excellent metering features that can be used through a 3 or 6-stop ND filter. However, I’ve found that if there isn’t enough light or the ND filter is too strong, I’ve had to resort back to Method 1 and calculate the adjusted shutter speed. So it’s a good thing to keep the app handy.
Focusing a Scene that’s Taken With an ND Filter
Before I take a shot, the last thing I do is focus the camera. This way, I’m not making any adjustments to the camera that might impact the focus.
Similar to adjusting the exposure, if your camera can focus the scene with the ND filter mounted, use this method as it allows you to focus as the final step.
However, if the camera can’t focus on the scene through the ND filter, remove the ND filter, focus the camera and place the filter back into position carefully to avoid messing up the camera’s focus.
Neutral Density filters are available in a circular screw-on and a Square format that mounts to the lens using a filter holder.
Which ND Filters systems are best for Seascapes?
A Filter Holder system is a better choice for Seascapes and Landscapes, as the system can be used on any lens via an adapter ring. In addition, the square filters can be interchanged, so you can respond quickly to changing light conditions, and the filters can also be stacked to suit challenging scenes.
While there is a more significant investment upfront, the benefit of using your entire range of filters on any lens, regardless of its thread size, means you can get greater use out of your interchangeable square filters.
The Solid ND filters are 100mm x 100mm square pieces of glass and can be stacked with the 100mm x 150mm ND Graduated filter. I use the same Filter Holder system on my Fujifilm X-T3, Nikon Z7, Nikon D850 and GFX100s cameras.
Screw-on filters are initially more cost-effective and are simpler to attach to the lens, so they are usually recommended for beginners with one or two lenses of the same size.
However, as you extend your lens range, you will likely need to purchase multiple filters of various sizes to match each lens thread size in your collection.
Selecting the Right ND Filter for Seascapes?
A 3-stop ND filter is ideal for a multi-second shutter speed in low-light scenes, like sunset and sunrise. In cloudy grey conditions, a 6-stop ND filter will extend your shutter to nearly a minute. If there’s plenty of light in the scene, a 10-stop ND filter can slow the shutter speed to over a minute or more.
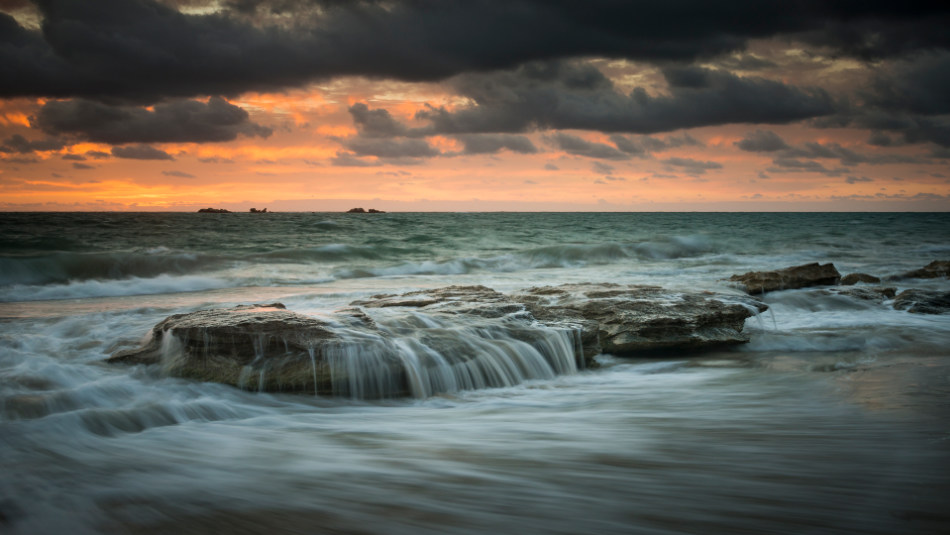
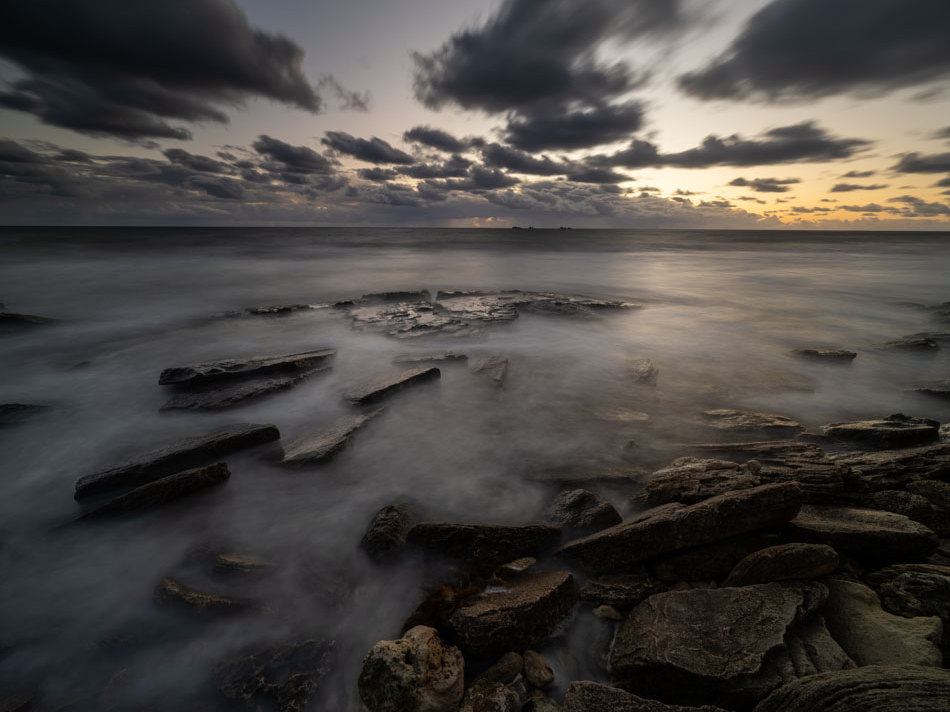
Adding an ND filter has the biggest impact on moving elements in a seascape scene.
Campare the two images in the gallery below and see the difference a Solid ND filter makes on the elements that move, like the clouds and water.
As you decide which ND filter to use, identify the objects in motion within the frame and how fast these objects are moving. Then, consider what effect you’d like to create with these moving elements.
Finally, determine the speed of the shutter required to produce the desired effect, a few seconds or a few minutes, and then select the appropriate ND filter strength.
It’s fun to experiment with ND filters and explore the effects you can create with them.
The more you shoot with different ND filter densities in various conditions, the more you’ll become familiar with how much light is removed with each ND filter’s strength and the impact on the image.
While you can use (this table) as a guide to establishing the effect of each ND filter strength, I prefer a more straightforward approach where I estimate which ND filter I’ll need, monitor the change in exposure using the histogram as it’s mounted to the lens and then swap to a different filter if required.
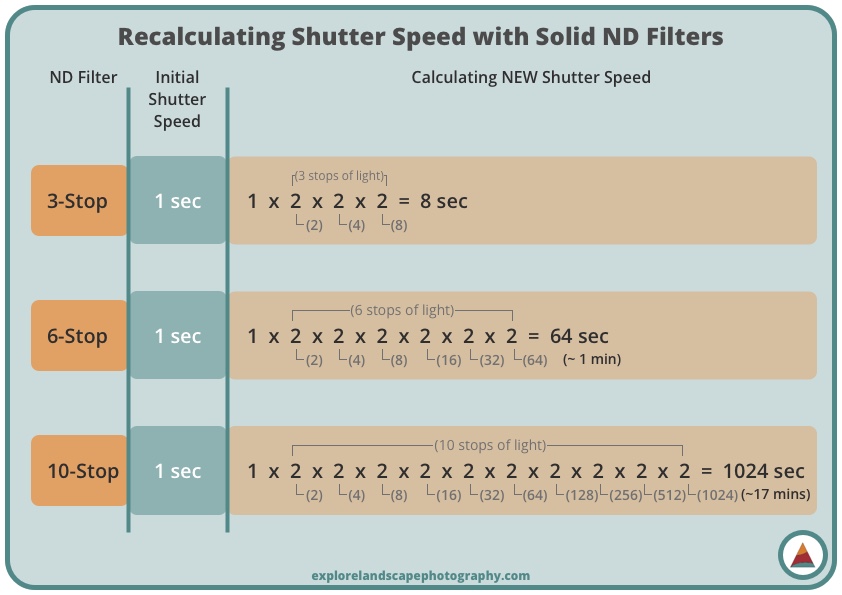
You can quickly determine an ND filter’s direct impact on the light and calculate the new shutter speed.
A 6 Stop ND filter will reduce the light by 6 stops. So if you had the correct exposure set on your camera with a 1 second shutter speed, when I attached a 6-stop ND Filter, I’d have to double the shutter speed six times, making it around 1 minute.
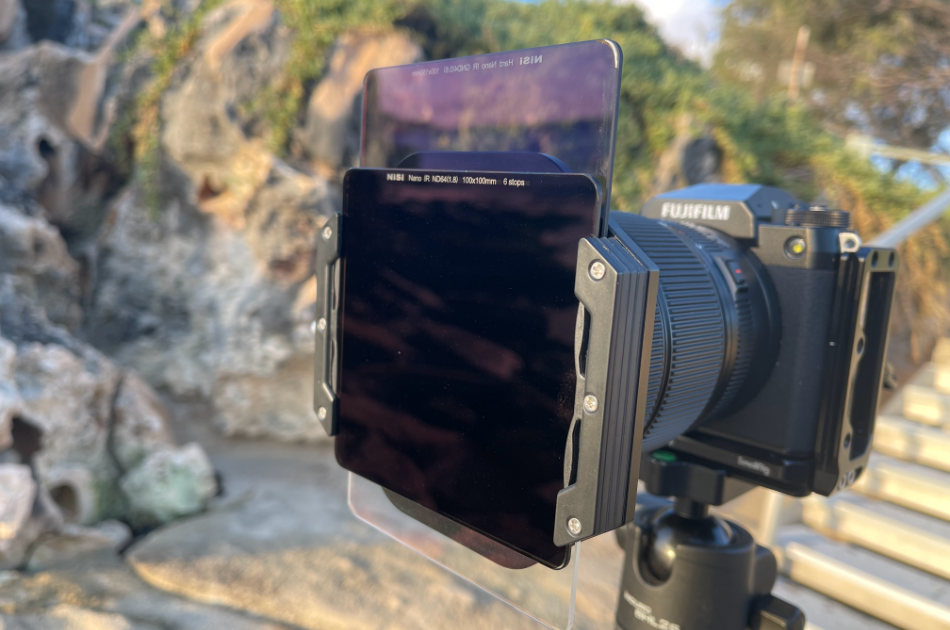
How to Correctly Mount Square ND Filters?
Some photographers suggest you remove the filter holder from the lens each time you add or swap a filter.
This method has several issues, particularly when shooting on the beach.
- As the light changes, you may change the filters you use several times. If you have to detach and reattach the filter holder each time, there’s a high chance you’ll bump or move the camera or lens, which may mess up your composition or settings.
- Each time the filter holder is removed from the lens, the glass at the front is exposed to the wind, sand and sea spray, which, if left, will appear as marks in your image.
- Most systems use a clip mechanism when attaching the filter holder to the mounting ring on the lens. If you don’t carefully ensure the clip is secure, the entire holder can fall off the lens, including any ND and CPL filter.
I prefer to leave the filter holder attached to the lens and swap in and out filters as required.
As you attach a Solid ND filter, use the filter slot closest to the lens. If there is foam on one side like there is in the image, turn the filter so the foam is towards the lens. The foam will press up against the front of the lens, creating a seal that blocks any light from leaking between the ND filter and the lens.
When you slide in a Solid ND filter, ensure you place one or two fingers underneath the holder to support the holder and lens as you push down on the filter to slide it into place.
Best Shutter Speed to Use for Seascapes?
A significant factor that influences which ND filter to use is the desired shutter speed you want to achieve.
A faster shutter will freeze most movement within a scene, and with a slower shutter, motion is blurred, and patterns are generated in the image.
While there are other factors to consider, like the amount of movement in a scene and the speed at which elements move, here is a quick guide to longer shutter speeds to extended long exposures.
Faster than 1/6 of a second – Most movement is frozen in an image unless the object moves quickly or is close to the camera.
1/5 to 1/3 of a second – Ideal for fast-moving water, the camera will capture a little blur in water motion with a fair amount of detail retained.

1/2 to 1 second – Emphasizes the movement of the water and captures patterns. It draws out the motion of the water and can produce leading lines if the water is moving towards or away from the camera.
1 to 5 seconds – The water motion is exaggerated. Longer lines and patterns can be captured. However, you can start to lose some of the detail within the movement of the water, particularly if the water has time to reverse in direction while the shutter is open. This length shutter speed is effective when water moves slowly or is far from the camera.

5 to 20 seconds – Most detail is lost, and the rapidly moving water close to the camera can look milky. Shutter speeds of this length effectively flatten ripples on the water’s surface to achieve a clean look. This is a great way to simplify a scene or let the camera pick up more detail underneath the water’s surface.
Longer than 20 seconds – as you extend the shutter beyond 30 sec, the effect on moving water doesn’t change significantly. However, these slower shutter speeds can effectively capture the motion of slower-moving elements like clouds. Thirty seconds or more will give the clouds time to move across the sky while the shot is taken, creating a more significant effect in an image.
Should You Always Use an ND Filter for Seascapes?
Using an ND Filter is one way to capture seascapes and create compelling images, but it’s not the only way.
If you encounter some of the issues described above, like a messy scene, complexity, or distracting movement, then applying an ND filter may help.
An ND filter can be helpful if you are trying to achieve a particular effect and create a specific mood.
However, simply turning up to a seascape and mounting an ND filter to the lens will not guarantee better results.
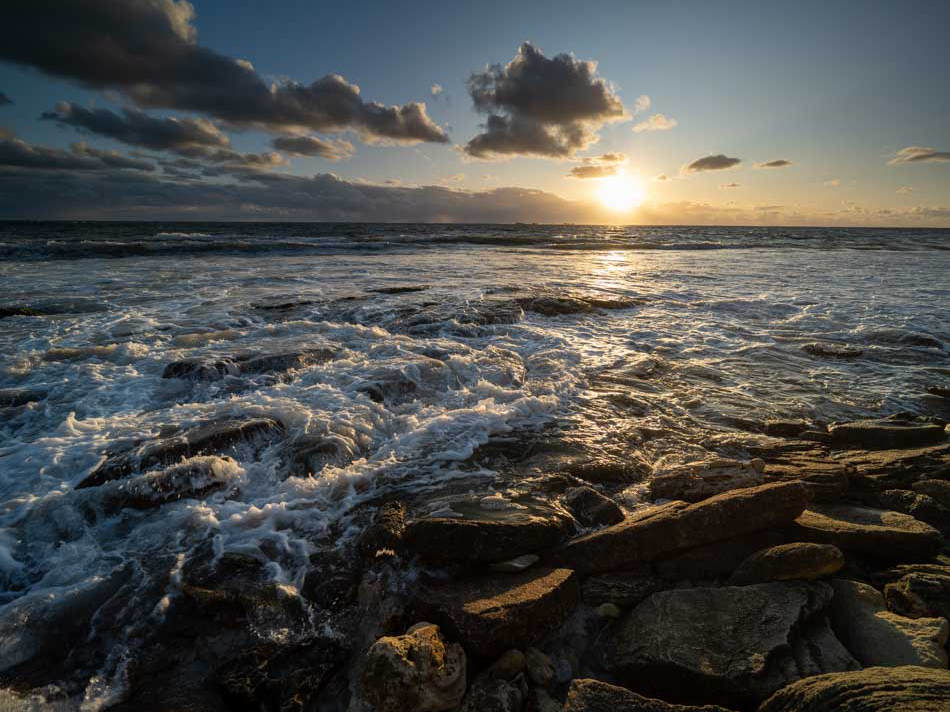
For the image below, I wanted to tell the story of when this large wave smashed into this huge boulder.
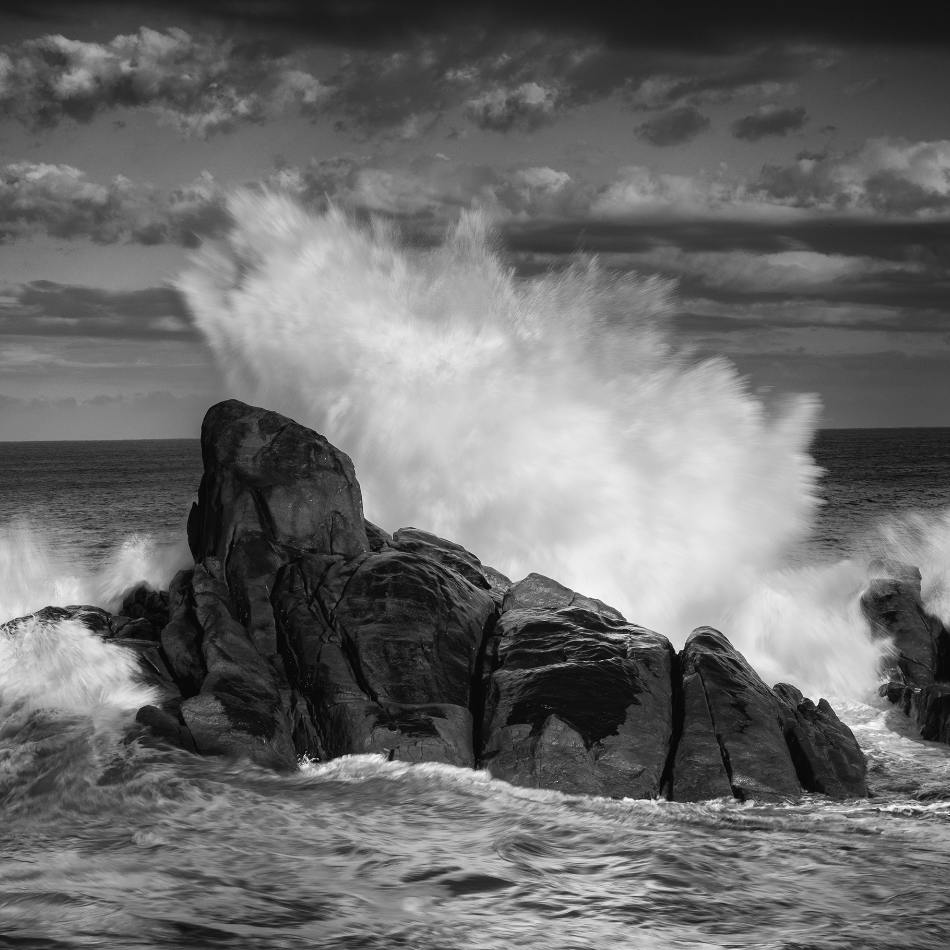
A Solid ND filter would have lengthened the exposure. I needed a fast shutter speed to capture the power of this interaction so that the viewer could witness and feel that energy through the image.
Instead, use a considered approach to identify the issue or artistic effect you want to accomplish and assess if an ND filter is the correct tool and what strength filter you should apply to achieve your desired results.
QUICK RECAP
Solid ND filters reduce the amount of light from across the entire scene.
By decreasing the light, ND filters allow you to slow down the camera’s shutter speed.
Various levels of ND filters can effectively reduce the amount of light passing through.
When selecting an ND filter for a seascape, consider how fast any moving element travels, the shutter speed you want and the amount of light you need to remove from the scene.
Experiment with different Solid ND filters in various scenes to become familiar with how these ND filters can impact the image you capture.