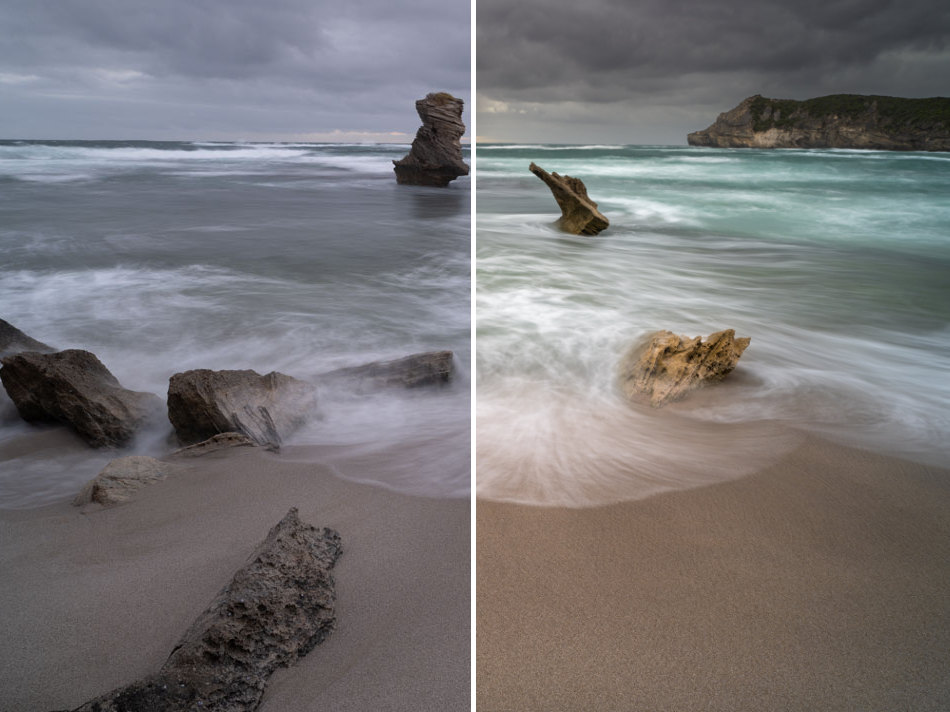
I find the beach and coastline are such inspiring places to shoot photos.
Something always makes an exciting scene, from dynamic crashing waves to tranquil rock pools. But it can be confusing to figure out the best camera settings to capture that scene perfectly.
For seascape images, shoot in RAW format at the native resolution of the sensor, 3:2. Use Single Point focusing and Manual exposure mode with an aperture of f/11 to f/16, a shutter speed of 1/3 to 2/3 of a second at the camera’s Base ISO (ISO 100).
Here’s a complete list of my camera settings to capture seascapes.
| Format | RAW |
| Crop Mode | 3:2 (Aspect Ratio of the Sensor) |
| White Balance | Auto |
| Metering Mode | Average |
| Focus Mode | Single Point |
| Exposure Mode | Manual |
| Exposure Monitoring | Histogram in Live View |
| ISO | 50 to 100 |
| Aperture | f/11 to f/16 |
| Shutter Speed | 1/4 to 2/3 Sec (Blur movement) |
| Drive Mode | Single shot |
Dialing in the correct camera settings and other accessories to capture a seascape scene is one of the 5 Core Principles of Landscape Photography that are fundamental to creating beautiful beach photos.
If it was a case of just using these settings and you could take a great image, seascape photography would be easy.
But there’s a little more to it!
So let’s explore why we should use these settings to prepare you for your next seascape photography adventure.
Shoot Your Seascape Images in RAW
If you intend to edit your images in any way, you should be capturing your photos in RAW.
RAW is the image format containing the most data from the camera’s sensor.
This extra detail is in the textures, the tonal range and the spectrum of colors in the scene.
All the extra information in your RAW file makes it easier to bring out all this detail when post-processing the image.
Unedited RAW images appear dull, lacking contrast and saturation. Before they are suitable to share, RAW files require some editing.
Some photographers prefer to shoot in jpeg format, which lets the camera edit the image for you automatically.
While the camera does a reasonably good job at editing the image, you don’t have any control over how the image is processed.
If you try to edit a jpeg file, you’ll be limited in what you can do before the image breaks down and you start seeing artifacts.
I configure my camera to shoot RAW and jpeg for each image I take to have the best of both worlds. I can grab the jpeg version of a photo if I want to share it on social media quickly, and I have the RAW version when I require the level of information I need to edit a final picture.

SanDisk 128GB Extreme PRO
The SanDisk cards are my go-to SD cards for all of my seascape and landscape photography. Fast and reliable!
Due to the large amount of data in RAW images, the file size is larger. To ensure you can take plenty of photos in RAW, have a good quality memory card plus a few extras, just in case.
Capture Photos Using the Entire Sensor
When you compose a scene you are capturing, you may have the image ratio you intend the final photo to be in your mind.
Some cameras allow you to adjust the size and ratio of the image the camera captures, like 3:2, 4:3, 16:9, or 1:1.
However, it’s unnecessary to preselect the ratio of the captured shot, as this is something you can adjust while editing the image.
Set the image aspect ratio in the camera to that of the sensor, usually 3:2 for full format. That way, you are utilizing the entire sensor, capturing as much of the scene as possible, even if you intend to crop the image later.
| APS-C | Ratio 3:2 |
| Full Frame | Ratio 3:2 |
| Medium Format (Fujifilm) | Ratio 4:3 |
| Medium Format | Ratio 4:3 |
This can be particularly important when shooting seascapes because there are often moving elements in the image that you should account for when choosing your framing.
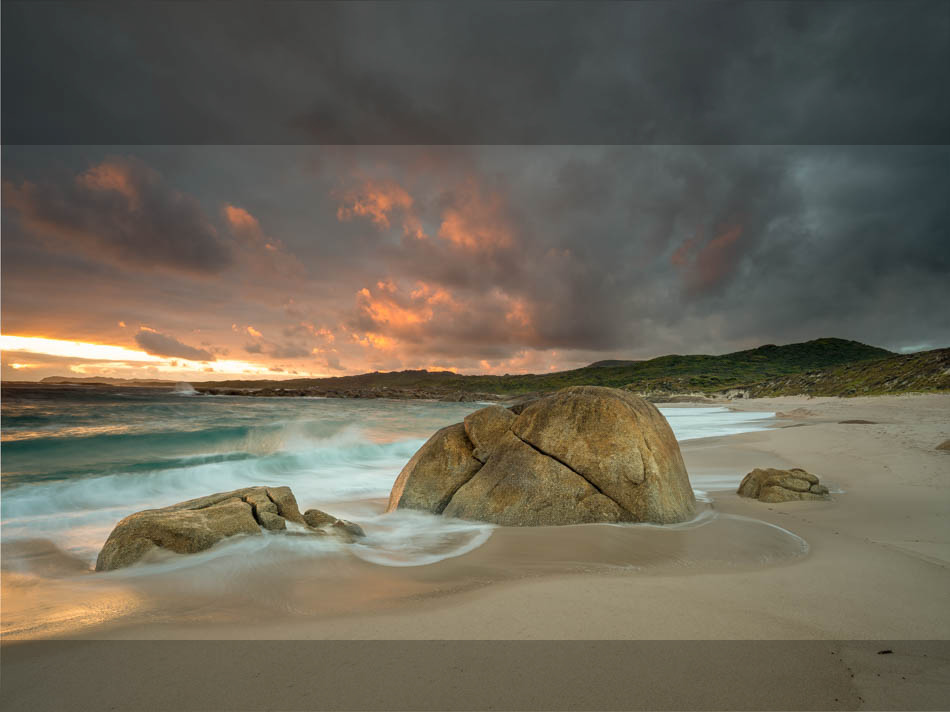
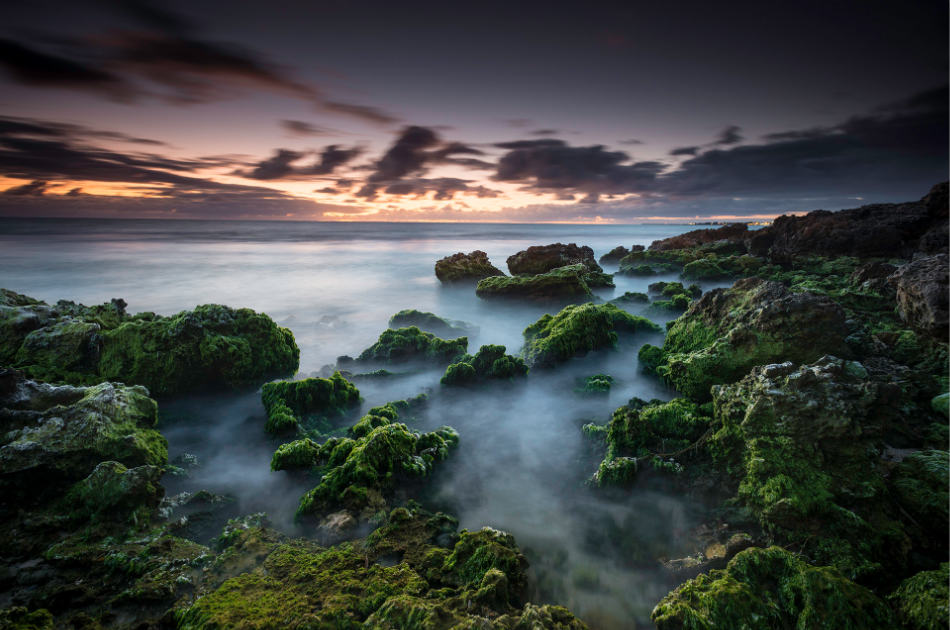
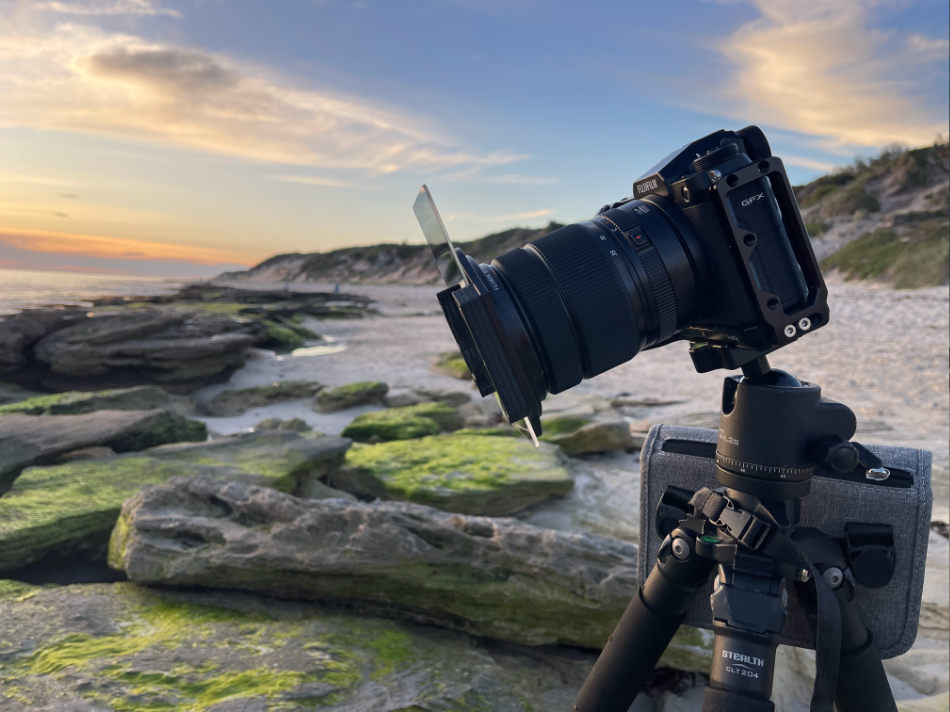
When I was shooting this scene, waves pushed water toward the camera.
Even though I was thinking of creating an image close to a 3:2, I captured the scene with a 4:3 shot, equal to the aspect ratio of the sensor in the Fujifilm GFX50S.
This allowed me to account for where the water was positioned in the foreground, as I was unsure where the water would stop with each wave.
When I examined the image on the laptop, I decided to crop the picture to 16:9 for the final image.
Taking the photo at the ratio of the sensor allows you to adapt and change your mind, which can be beneficial when shooting landscapes and seascapes where not everything in the scene is predictable.
Set a Low ISO for a Clean Image
The standard advice for landscape photography is to shoot with ISO as low as possible.
But there’s more to it!
You can think of ISO as gain for light. As you increase the ISO, the camera amplifies the available light, so it appears there’s more.
The drawback is that noise is introduced into the image as the camera amplifies the light.
So a low ISO will give you the cleanest image.
| Nikon D850 | Base ISO 64 |
| Nikon Z 8 | Base ISO 64 |
| Nikon Z 7 | Base ISO 64 |
| Canon EOS 5DS R | Base ISO 100 |
| Sony A7R IV | Base ISO 100 |
| Pentax K-1ii | Base ISO 100 |
| Fujifilm GFX100S | Base ISO 100 |
| Fujifilm GFX50R | Base ISO 100 |
| Fujifilm X-T4 | Base ISO 160 |
| Fujifilm X-T5 | Base ISO 125 |
However, don’t hesitate to increase the ISO if the scene requires it. Let me explain.
I often want a specific shutter speed with moving water and waves in many seascapes.
So if I want a shutter speed of 1/3 of a second, I must adjust the aperture or ISO to expose the scene correctly.
Adjusting the aperture also changes the Depth of Field, the region of the scene in focus, which may result in parts of the seascape being out of focus.
Instead, I’ll increase the ISO as it has a relatively small impact on the image overall.
If the base ISO of the camera is 100, you can double that to ISO 200 and double it again to ISO 400 and not notice any impact regarding noise in the image.
The quality of sensors and the technology found in cameras produced today will allow you to use ISO 600 through to ISO 1600 and still capture clean images with very little noticeable noise.
Additionally, the ability to clean your images up with remarkably effective post-process software, like Topaz DeNoise AI and shooting with higher ISO values should not be seen as an issue.
So while it’s good practice to keep your ISO low, if the scene you’re capturing requires it, increase your ISO so you can properly expose the photo with the shutter speed you need.
Maximize your Depth of Field with Your Aperture
When capturing seascapes, use an aperture between f/11 to f/16 to provide a Depth of Field that includes the entire scene so all of the elements in your photo are in focus.
The Depth of Field (DoF) of your image is the area of the scene that’s in focus.
Impactful images of the ocean and coastline often have elements in the foreground close to the camera. Maximize your Depth of Field with a suitable narrow aperture up to f/16 to ensure these are sharp and in focus.
If you use an aperture over f/16, you may notice that details in the image start to get soft. This is the optical effect of diffraction in the lens. The only way to avoid diffraction is to keep your aperture under f/16.
If the seascape is bright and you can’t reduce the exposure by adjusting the ISO, shutter speed, or aperture, use ND and ND Grad Filters to remove some of the light from the scene.
Use a Shutter Speed to Freeze or Blur Motion
When shooting seascapes, a shutter speed of 1/125 a second or quicker will freeze a crashing wave. To blur the wave motion or moving water, use a shutter between 1/4 to 2/3 of a second. Dial in a shutter speed above 5 to 10 seconds to create an ethereal seascape photo.
The shutter speed selected affects how the motion of any moving element in the frame is captured in a photo.
Water and waves are the most common moving elements in a seascape.
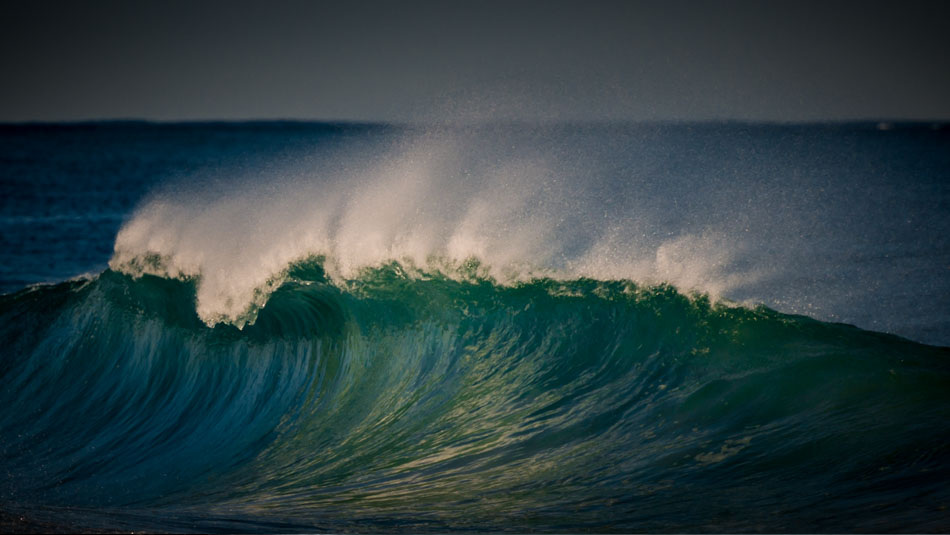
Freezing Water Motion
To freeze the dynamic energy of a crashing wave, select a fast shutter speed of 1/125 or quicker. This is catch sprays of water and the power of the wave’s impact.
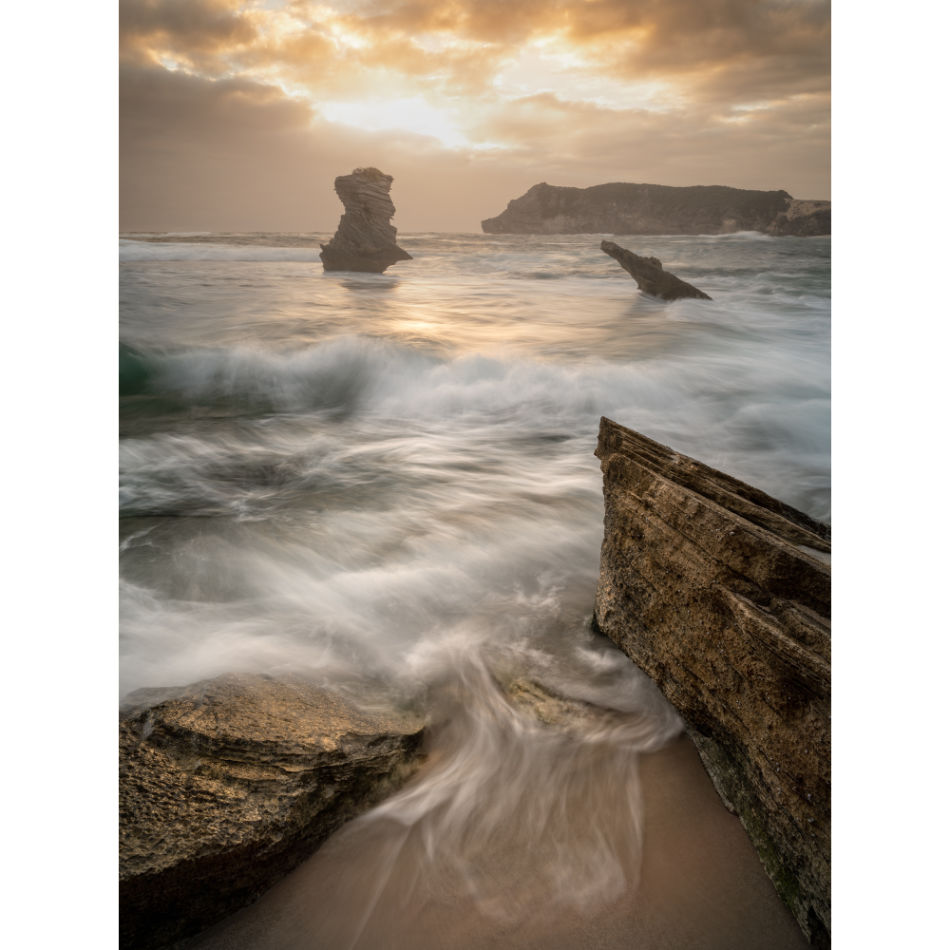
For many of the seascapes I shoot, I prefer to use a slower shutter speed and capture the motion blur of water pouring over rocks.
Capturing Motion Blur
Depending on the amount of water moving in the scene, I typically use a shutter speed between 1/4 and 2/3 of a second.
This results in a more tranquil picture that portrays a peaceful seascape scene.
Long-Exposure Seascapes
Using ND filters, you can extend the shutter speed from a few seconds to a few minutes and shoot long-exposure seascapes.
While the camera’s shutter is open, the water has time to move around in different directions and changes depth to create a misty effect resulting in an unearthly image of the sea.
To become familiar with its impact, experiment with different shutter speeds and obverse the contrast of captured motion along with sharp detail. Through this process, you’ll develop a style of seascape photos you prefer to create.
Metering Mode to Meter the Entire Seascape Scene
When I’m shooting seascapes, I like to have the Metering Mode set to meter the entire scene on Nikon is called ‘Matrix’ (Sony – Multi and Fujifilm – Average).
This metering mode provides a single number, usually an average, taken across the scene. This number is on a scale and helps determine if a photo will be under or overexposed.
However, this value has its limitations.
If the camera has a built-in Histogram available as I’m taking the shot, I’ll use it instead to monitor the exposure.
Use the Histogram to Monitor Exposure
I prefer to utilize the Histogram built-in into the camera to monitor the exposure of all my landscape scenes. But the Histogram is particularly helpful for seascapes as the light often changes rapidly, and you can get bright highlights that you need to be aware of.
A Histogram provides more information and allows me to determine where parts of the image may be blowout or shadows are too dark.
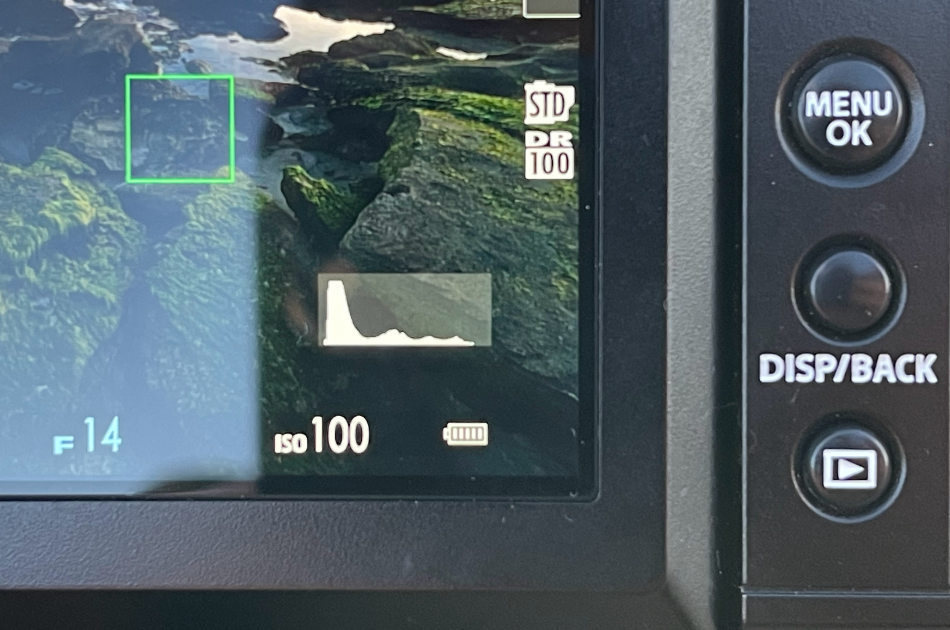
Many cameras provide the ability to view the histogram of an image you’ve captured through playback mode. This can be helpful, but monitoring the histogram of the scene in Live View is far more helpful so you can make adjustments before you take the shot.
Set the White Balance to Auto
As I mentioned previously, I shoot all images in RAW format.
As White Balance only affects jpegs and doesn’t impact RAW images, I set the White Balance to Auto.
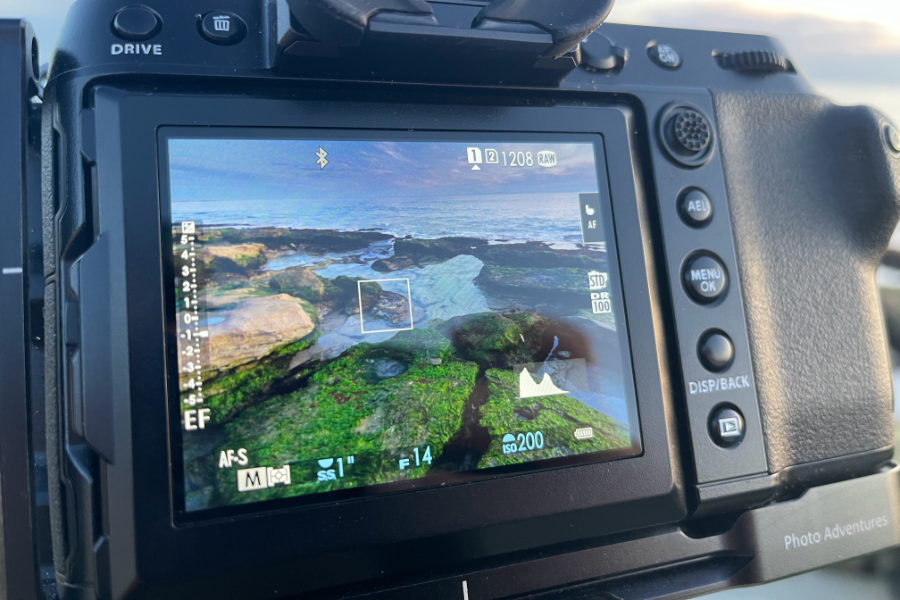
Shoot in Manual Mode so You Can Adapt
I prefer to shoot seascapes in manual mode to control the exposure in a constantly changing scene.
Let me explain!
Generally, seascapes have waves, water and anything else moving in the frame.
For many of the seascape images I shoot, I wait for a wave of the right size to push the water into the scene and then time the shot so I capture the motion blur of the foam and water.
The brightness level in this scene can be dramatically different when the water has drained out to sea to when there is water in the frame, as the white foam reflects more light.
I watch for a couple of waves to come through and monitor the change on the histogram in Live View on the back of the camera.
I adjust my exposure for when the foam in the frame and the scene is at its brightest. Then, when I’m happy with my exposure settings, I focus the camera and wait for the precise time when I want to trigger the shutter.
The last thing I want is for the camera to re-adjust to the exposure, in auto and semi-auto (priority) mode, as the water comes in and the brightness of the scene changes.
In manual mode, all these settings are set and fixed up front and don’t change regardless of what moves into the scene.
Set Focusing mode to Single Point
When shooting seascapes, set the camera’s focusing mode to Single Point and reduce the area of the point to small or one size bigger.
Single Point will allow you to precisely select the part where you want the camera to focus the scene.
Position the focus point on an area in the seascape approximately 1/3 into the scene to focus the camera.
So the camera has the best chance to grab focus, I select a point where an object or part of the scene is not moving.
You may have to wait for the waves to empty out of the scene to avoid the camera attempting to focus on the moving water, which may cause the camera to miss focus.
Utilize Auto-Focus on the camera
While I use manual mode for setting the camera’s exposure, I use a combination of Auto-Focus and Manual Focus to focus the scene. With Back Button Focus set up, I can move seamlessly between the two focus modes to ensure my images are sharp.
Most cameras available today have excellent auto-focus capabilities.
They can also focus in the dark, which is incredibly handy when shooting in low-light seascapes around sunrise and sunset.
Use Back Button Focusing
Back Button Focus (BBF) is quick to set up and provides an intuitive way to trigger the camera to focus.
An advantage of BBF is I can autofocus the camera with a push of a button and manually adjust the focus using the focus ring on the lens.
So autofocus and manual focus are available without switching focus modes.
This simple workflow allows me to adapt how I focus the camera no matter which scene I’m shooting.
Quickly Zoom in 100% to Check Focus
Before you hit the shutter, you should check the camera has correctly focused the scene.
The rear screen is small, so zoom into the picture and check the part of the scene you selected to focus on.
Set up one of the customizable buttons so you can zoom in 100% quickly.
The more efficient you make this process, the more likely you’ll check to focus each time you shoot a scene.
Some cameras also have focus peaking where the most focused region of the scene is indicated on the rear screen, sometimes highlighted in red.
Use Filters to Control Light across the Seascape
The dramatic light you can find along the coast helps make epic seascape scenes, but it can also be challenging to photograph.
I employ various filters designed to control the light across the scene, making capturing seascapes easier and ensuring I have the correct exposure.
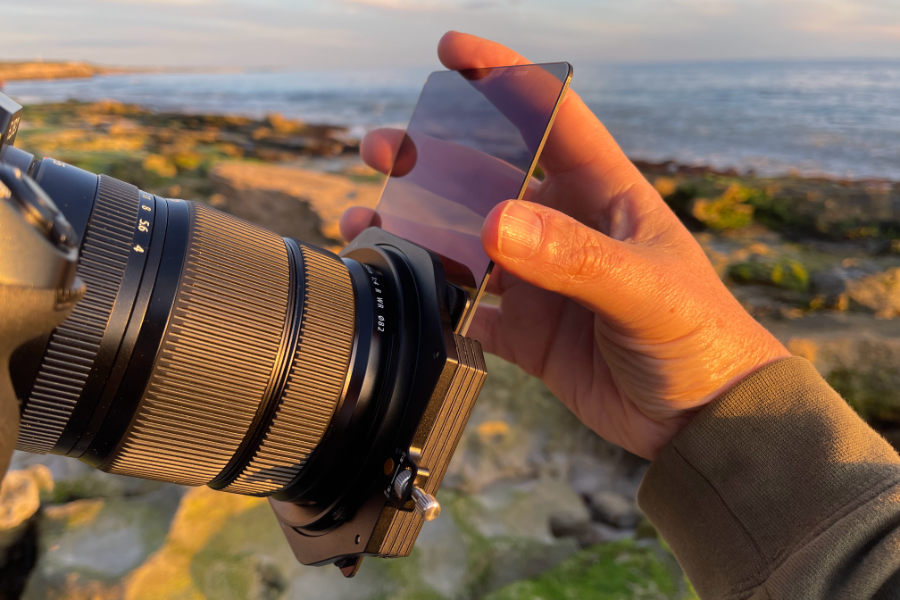
I use a Circular Polarizer (CPL) for most seascapes to reduce the glare that bounces off wet surfaces like rocks and sand. A CPL can also be used to remove reflections and help strengthen some colors in the image, like blues and greens, which are colors often found in seascapes.
Graduated Neutral Density filters can assist in seascapes where the sky is much brighter. Placing the darker part of the ND Grad filter so it lines up with the sky removes some of the light, resulting in a more even level of light across the scene.
Solid Neutral Density filters are helpful when you want to remove some light from the entire scene.
ND filters are useful when you want to set a specific shutter speed to capture the motion blur of the water or extend the shutter for a long-exposure seascape photo.
The filters I use the most when shooting seascape are:
- A Circular Polarizer (CPL)
- 0.3 Hard Grad Neutral Density Filter
- 0.6 Hard Grad Neutral Density Filter
- 0.6 Soft Grad Neutral Density Filter
- A Reverse ND Grad Filter
- A Horizon ND Grad Filter 4-Stop ND16
- 6-stop Solid ND Filter
Additional Accessories for Seascape Photography
Glass Cleaning Cloth
Let’s face it many seascapes are wet places with water going everywhere. Crashing waves, water pushing up the beach and sea spray if the wind is up.
To ensure your seascape images aren’t impacted by all this water flying around, you must keep the front of your lens clear of any water droplets.
So check it regularly and have with your a quality lens cleaning cloth.
A tiny cloth that is suitable for wiping over reading glasses isn’t going to cut it. While this type of cloth is excellent for removing fingerprints, it will soon be drenched with moister after taking up some salt water spray.
Instead, get a cloth that can absorb the water from a few wipes. It also needs to be microfiber to remove smudges and other minor marks.
It doesn’t need to be fancy, so don’t get tricked into buying a lens cloth at four times the price.

Microfiber Glass Cleaning Cloth
These are quality glass cleaning cloths at a fraction of the price, so you can have plenty on hand if needed. The Microfiber will leave your lens spotless, and they are large enough to absorb a moderate amount of water.
I use this, and I have at least five or so in my bag, so I can rotate them when they get too wet.
Remember, it’s way easier to remove the water spots from your lens before you take a shot than try to remove the effect of water spots in your image in post-processing software afterward.
Stabilize the Camera with a Tripod
If you use a shutter speed slower than 1/10 of a second, you should use a tripod to stabilize the camera.
Sure, with In-built Image Stabilization (IBIS), you can probably shoot with a shutter speed slow as 1/3 or 1/4 of a second, holding the camera in your hands. But any slower and again, you’ll need a tripod.
With a tripod, you can set up the camera in the same position and continually shoot the same scene over an extended period. This can be handy when the seascape changes with the light or as different amounts of water move through the frame.
I recommend a tripod with legs that independently move for seascapes to make it easier to position the tripod on uneven surfaces like rocks.
I prefer tripod legs that use screw locks to fix the height of the legs over a clamp style, as they are more straightforward to use and easier clean off the salt water and sand after shooting at the beach.

Induro CTL204 Carbon Fiber Tripod
A fantastic middle ground for price, quality, weight and sturdiness. The screw locks make it an excellent tripod for seascapes and general landscape photography.
Remote Shutter
Once your camera is mounted to a tripod, you must avoid shaking it as you press the shutter button to take the shot.
One way to reduce the risk of accidentally moving the camera as you take the shot is to use a 2-second timer. This delays the camera taking the image by 2 seconds, giving the camera time to stop shaking before capturing a photo.
However, for seascapes, you want to be able to control the exact timing of the shot so you capture the effect of the water and its interaction with the rest of the scene.
To do this, use a remote shutter to trigger the shutter at the exact time you wish without touching the camera.
This doesn’t need to be an expensive accessory.

Pixel Remote Shutter Release Cable
An inexpensive remote shutter cable that is reliable and doesn’t require messing around with wireless connections. Available for all makes and models of cameras.
I prefer a generic wired remote shutter because it uses the camera’s battery, and I don’t have to worry about pairing the remote with the camera each time I want to use it.
They are cheap enough that I don’t worry if it gets wet from the waves. I have a second hit in my bag as a backup.
Wireless units are available, but make sure the batteries are charged before you head out.

Pixel Wireless Remote Shutter Release
A wireless solution to remotely trigger the shutter avoids any camera shake risk. Available for all makes and models of cameras.
QUICK RECAP
Set your camera up to capture seascapes by shooting in RAW in an aspect ratio that uses the entire sensor. Use Auto White Balance and Single Point Focus.
Use Manual exposure mode with a low ISO around 100, Aperture between f/11 and f/16 to maximize the Depth of Field and a Shutter Speed between 1/4 and 2/3 of a second to capture the motion blur of the water.
Meter the exposure using the Histogram and adjust your ISO if required.
Have the camera mounted to a tripod and, using a remote shutter, take the shot at the precise time to capture interaction and the effect of the water as it moves into the foreground of the image.